When I started growing my own food, one of the things I was most apprehensive about was growing mushrooms.
How is it done? Where do I start? What growing conditions do they need?
As it turned out, I was fretting for nothing, and it’s all thanks to mushroom growing kits. They are beginner-friendly and don’t require special skills or equipment.
I’m happy to report I was able to grow my own mushrooms on the first try with the help of a mushroom growing kit.
If you’re thinking about becoming a mushroom farmer, consider this the push you need. I’ll talk about mushroom growing kits and everything you should know about growing your own mushrooms. You’ll also find my selection of the best available mushroom kits.
Best Mushroom Growing Kit Brands in the Market
1. Back to the Roots: Growing Organic Food and Eco-Awareness from the Ground Up
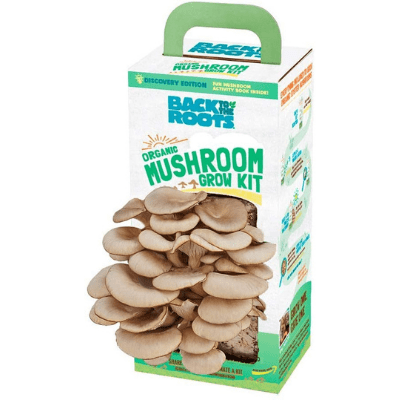
Back to the Roots started with a mission to turn waste into growth — literally. Their first mushroom kit reused spent coffee grounds, kickstarting a movement in accessible home gardening. Today, the brand focuses on 100% organic, non-GMO grow kits that make sustainable food cultivation possible for anyone with a windowsill.
As a certified B Corporation, Back to the Roots balances profit with purpose. They’ve taken bold steps in sustainable packaging, shifting to post-consumer recycled plastic in their soil products and reducing their carbon footprint with every iteration. Their mushroom kits promote zero-mile food by eliminating transport emissions and encouraging local, homegrown produce.
The brand’s educational partnerships and “grow one, give one” model add to their impact, introducing sustainability to classrooms across the country. While their kits are beginner-friendly, their deeper value lies in long-term environmental stewardship and sparking curiosity about where our food comes from.
If you’re looking for a mushroom kit backed by a brand that walks the sustainability talk, Back to the Roots is a standout example of ethical entrepreneurship in action.
2. Root Mushroom Farm: Turning Agricultural Waste into Edible Ecosystems
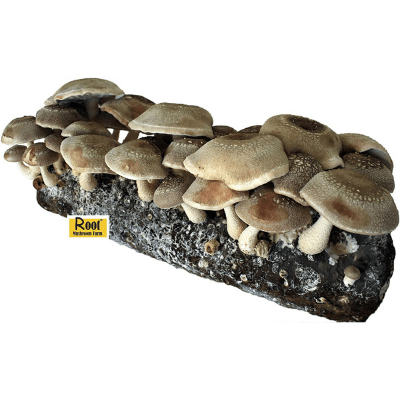
Root Mushroom Farm takes a grounded, no-fuss approach to mushroom growing — and their kits are as resourceful as they are educational. By repurposing agricultural by-products like wheat bran, sawdust, and spent coffee grounds as growing mediums, Root embodies a circular economy mindset right from the source.
While they fly under the radar compared to splashier brands, Root’s low-impact growing practices are quietly impressive. Their kits are designed for reuse and often come with refills, which helps cut down on packaging waste. They also favor minimalistic packaging and simple instructions to keep the focus on sustainable food growing.
The company’s ethos is rooted in making mushroom cultivation approachable and waste-free. Their products are crafted with practicality and environmental impact in mind, giving everyday growers a reliable way to reduce food waste and embrace self-reliance.
If you want an eco-forward brand that keeps things humble yet effective, Root Mushroom Farm is a great pick for functional sustainability at home.
3. North Spore: Cultivating Mushrooms with a Mission-Driven Mindset
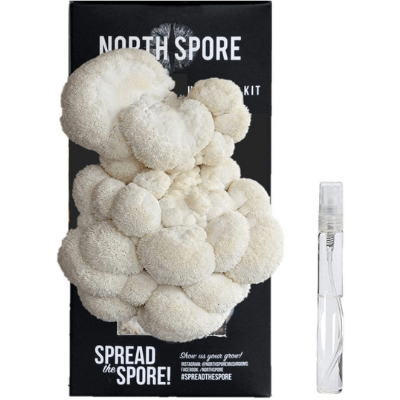
North Spore is more than a mushroom kit company — it’s a movement for mindful mycology. With roots in Maine, the brand emphasizes environmental regeneration, highlighting how fungi can help restore ecosystems, detoxify soil, and close food system loops. Their kits aren’t just about growing food; they’re about growing knowledge.
Sustainability is built into everything North Spore offers. Their growing mediums are certified organic, their packaging choices reflect an eco-conscious approach, and their operations prioritize composting, recycling, and responsible sourcing. The Lion’s Mane and other grow kits are USDA organic, catering to health-conscious and eco-minded consumers alike.
Their mycology education content, from online guides to workshops, empowers users to understand not just how mushrooms grow, but why it matters. And while North Spore doesn’t market itself as a “green brand” in loud terms, their actions — from regenerative growing to low-impact logistics — speak louder.
For those who see mushrooms as more than a meal, North Spore offers a purpose-driven, planet-positive approach to indoor growing.

What Is A Mushroom Growing Kit?
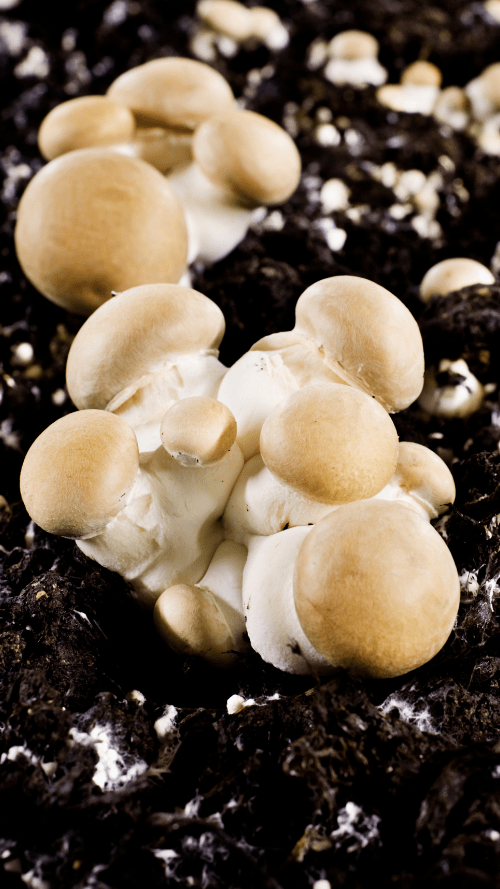
A mushroom growing kit is a pre-prepared box or log seeded with mushroom spores, designed to simplify the mushroom cultivation process for you. Essentially, it’s a “fruiting block” that’s ready to grow mushrooms under the right conditions.
This fruiting block consists of substrates like hardwood sawdust and bran, which are already colonized by mushroom mycelium. The hard work of preparation is done; your task is to provide the right conditions for growth.
Mushroom grow kits are conveniently packed in grow bags and can be stored for a long time in a cool place or a fridge until you’re ready.
You have options ranging from shiitake to enoki, oyster, and lion’s mane mushrooms. But, not every mushroom is suited for kit growth. Oyster mushrooms, for instance, are particularly adaptable and don’t require perfect conditions to thrive, making them a common choice in these kits. They grow quickly and don’t need much maintenance.
Compared to traditional farming, a mushroom growing kit is far easier. There’s no land preparation or substrate selection needed. Simply open the kit, ensure there’s enough fresh air, light, and humidity, and start growing your mushrooms.
Understanding the Mushroom Life Cycle
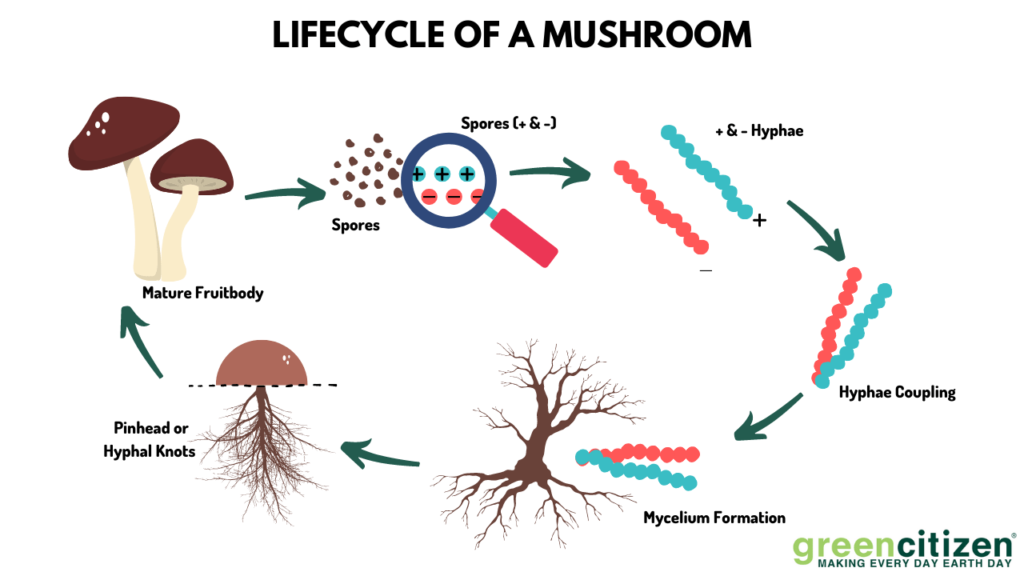
This is how a mushroom life cycle works:
Spore Stage
Think of spores as mushroom seeds. Released from a mushroom cap’s gills, these microscopic particles can travel far from their parent, laying the groundwork for new fungal growth.
Hyphae Stage
Once spores land on a suitable surface, they germinate and grow into hyphae. These are tiny fungal threads that eventually group together. It’s essential to note that hyphae from genetically diverse spores merge to increase the chances of successful reproduction.
Mycelium Stage
When hyphae from different genetic backgrounds intersect, they form mycelium. This network acts like the roots of the mushroom, anchoring it to the substrate and absorbing nutrients. Mycelium is crucial for the next growth phase.
Hyphal Knots Stage
With sufficient nutrition, the mycelium develops hyphal knots. These are the precursors to mushrooms, visible as tiny pinheads. They require time and more nutrients to grow.
The Fruitbody Stage
Pinheads expand and develop into mature mushrooms, known as the fruitbody. This is the stage most recognizable as mushrooms. Mature fruitbodies produce spores, and the cycle begins anew.
Mushroom Cultivation Stages (WITHOUT A Mushroom Growing Kit)
If you’re cultivating mushrooms without a mushroom grow kit, you’ll follow the life cycle mushrooms go through when growing in the wild. However, there are a few key differences you want to make for optimal harvest.
Step 1: Start with the Spores
Embarking on mushroom cultivation begins with substrate preparation, your mushrooms’ growing medium.
Choose a tray approximately 14×16 inches and 6 inches deep, made from wood, metal, or plastic, according to your preference.
Mix compost and manure in a suitable ratio (for example, 2:1) to enrich the substrate. Fill your tray with this mixture, leaving about an inch of space at the top. Then, carefully spread the spores over the substrate.
To prevent unwanted mold or fungi, perform this step in sterile conditions. Wash your hands thoroughly, and sterilize all equipment with alcohol or by boiling. This preparation ensures your mushrooms have the best environment to thrive, free from competitors.
Step 2: Keep the Soil Moist
Mushrooms thrive in humid conditions, requiring consistently moist substrates to grow healthily.
To achieve this, lightly mist the substrate twice daily, ideally in the morning and evening, using a spray bottle. This method helps maintain optimal humidity levels, generally between 80-95%, crucial for mushroom development.
Alternatively, covering the substrate with damp towels can also preserve moisture. Ensure these towels remain moist by re-wetting them as needed, depending on your indoor air conditions.
Step 3: Incubation Time
To ensure your mushrooms grow healthily, maintaining the soil temperature around 70 degrees Fahrenheit is key, especially during the initial three-week growth period. This temperature range is ideal for mycelium development, leading to successful mushroom cultivation.
Use a soil thermometer to regularly monitor the soil’s temperature. To maintain this ideal temperature, you might place the tray in a warmer area of your home, where stable warmth can be assured without direct heat sources that could dry out the substrate.
Alternatively, consider investing in a seedling heat mat with adjustable temperature controls. Place it underneath the tray for consistent heat distribution. If using a heat mat, it’s vital to check the temperature frequently to prevent overheating, which could damage the mycelium. Always follow safety instructions to reduce the risk of fire, particularly with electrical devices like heat mats.
Pro Tip: Check the temperature occasionally, as a temperature that’s too high can kill the spores.
Step 4: Time to Lower the Temperature
Once the mycelium fully colonizes the top of the soil, forming a white layer across the entire tray, it’s time to adjust the environment for the next growth phase. This white layer is your signal to reduce the temperature to between 55 and 60 degrees Fahrenheit, which simulates the natural cooling period mushrooms experience before fruiting.
If you’ve been using a heating pad, remove it now to facilitate this temperature drop. Next, gently cover the mycelium with an inch of sterilized or organic potting soil. This mimics the natural covering mushrooms would find in the wild, encouraging the next stage of growth.
Within a few days of adjusting these conditions and maintaining consistent moisture, you should begin to see primordia, the tiny beginnings of mushroom fruit bodies. Keep in mind, the appearance of these tiny mushrooms varies in time, so patience and careful observation are key.
Pro Tip: Unlike many other fruits and vegetables, you should grow mushrooms in winter because they like cooler temperatures.
Step 5: Harvest Time
The duration your mushrooms need to grow before harvest varies with the species you’re cultivating. Generally, it’s best to harvest when the caps are fully open and no longer attached to the stems.
Harvest the mushrooms by using a sharp knife to cut the stem at its base. This method helps protect the mycelium and encourages future growth.
With regular harvesting, your mushroom crop can potentially produce for up to six months, as this process stimulates continuous spore release. When production eventually slows, introducing more spawn can kickstart a new growth cycle.
Keep in mind, freshly harvested mushrooms have a limited shelf life. To maximize freshness, store them in a cool, ventilated area and plan to use them within a few days. If you notice a significant decline in production, it may be time to refresh your substrate and add new spawn, following the specific needs of the mushroom variety you’re growing.
Pro Tip: Don’t pull the mushrooms because you’ll damage the surrounding growth
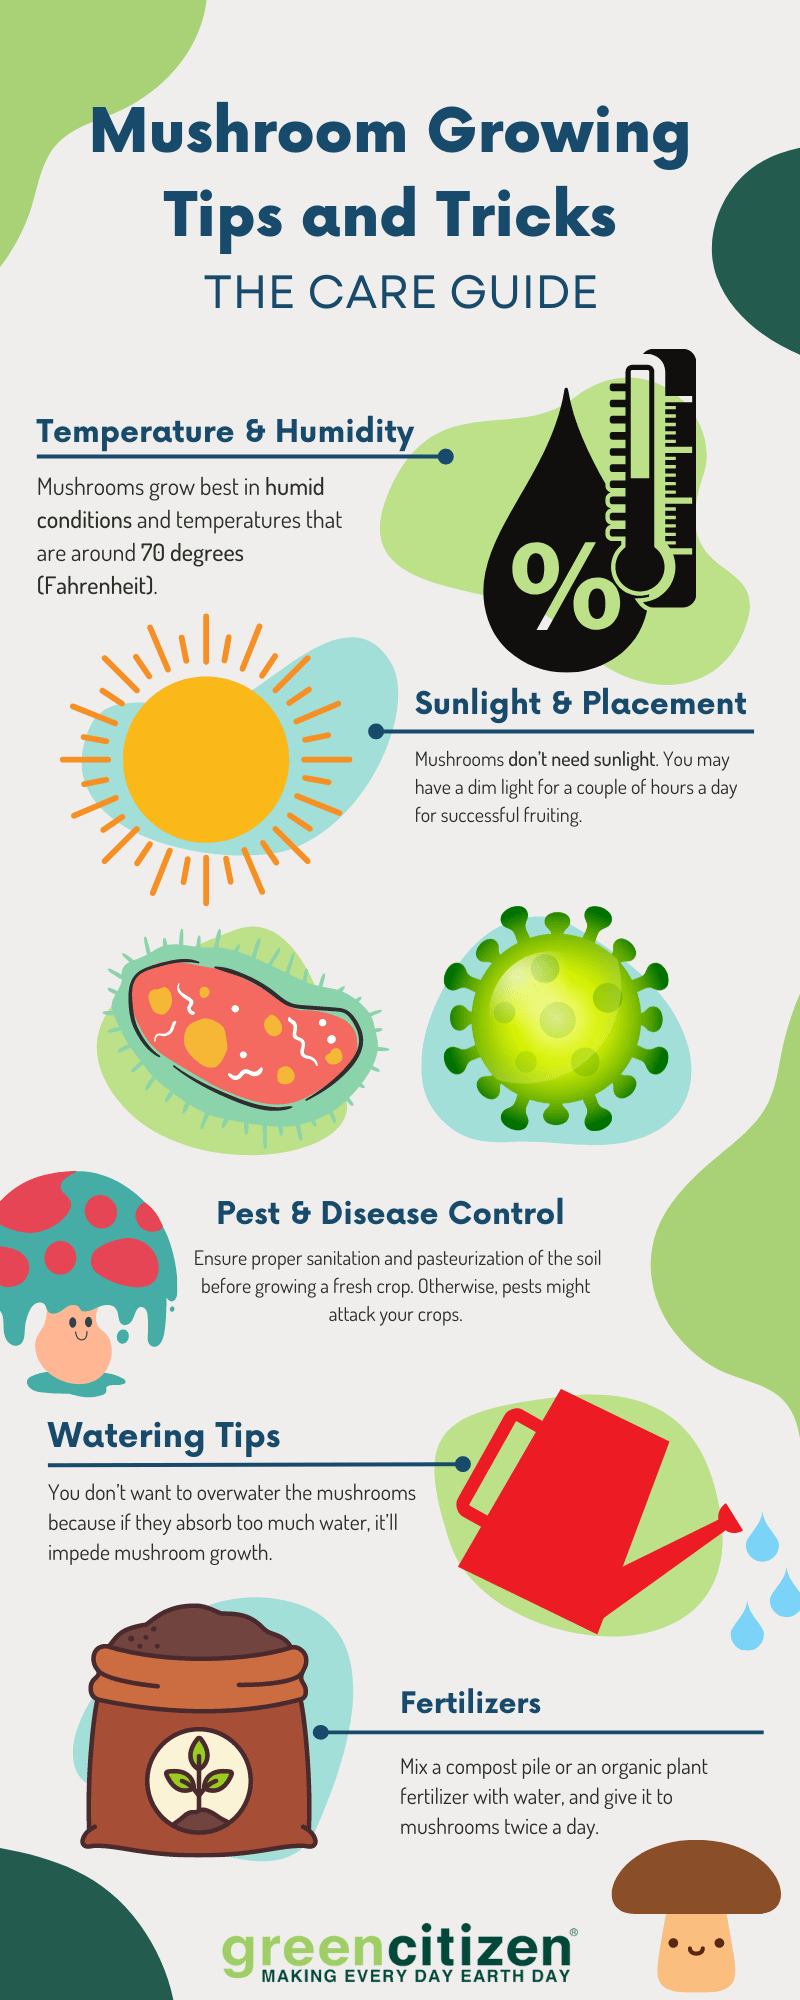
Mushroom Growing Tips and Tricks (The Care Guide)
Temperature
For optimal growth, mushrooms require humid conditions and a stable temperature around 70 degrees Fahrenheit. Surprisingly, your home contains various microclimates; some warmer spots are often found closer to the ceiling. Utilize a thermometer to explore these microclimates, identifying the ideal location for your mushroom kit or tray.
Initially, position your setup in an area where the temperature hovers close to 70 degrees. As your mushrooms approach the fruiting stage, transition them to a cooler spot with temperatures between 55 to 60 degrees. This can be achieved by moving the mushrooms to a naturally cooler part of your home or adjusting the temperature of their current location.
To maintain the necessary humidity, regularly mist your mushrooms or cover them with a damp cloth. This simulates the moist environment mushrooms thrive in. If you’re using heating or cooling devices to manage temperature, always follow safety guidelines to prevent any risks.
By implementing these tips, you’ll create an environment conducive to mushroom growth, mimicking the natural conditions they prefer. Whether adjusting your home’s microclimates or using tools to regulate temperature and humidity, these strategies will help you cultivate healthy, fruitful mushrooms.
Sunlight and Placement
One of the joys of growing mushrooms is their minimal space requirements and low need for sunlight, compared to many plants and vegetables. This flexibility allows you to explore various nooks for cultivation, from a quiet cabinet corner to the consistent coolness of your basement or garage.
Mushrooms lack chlorophyll, making sunlight unnecessary for their energy production. However, a few hours of dim light each day can guide their growth direction and support the fruiting process. This can be as simple as indirect sunlight or the ambient light from a room. It’s essential, though, to shield your mushrooms from direct sunlight, which can inhibit their development.
When selecting a spot for your mushroom kit, consider not just light but also the environment’s temperature and humidity. Ensure that the location, even if it’s as unconventional as a drawer, is occasionally opened to promote air circulation, a key factor in healthy mushroom growth. By balancing these elements, you’ll create an optimal setting for your mushrooms to thrive, regardless of their unconventional home.
Pro Tip: You can use a fluorescent lamp if you place mushrooms in a dark place, such as a cabinet or a drawer.
Watering Tips
Ensuring your mushrooms receive the right amount of water is key—they should never be overwatered. Overly wet conditions can hinder growth, as mushrooms are sensitive to excessive moisture. To prevent this, observe the soil closely; avoid watering until the surface appears dry and powdery to touch.
A creative solution for maintaining ideal humidity around your mushrooms is to cover their tray or box with burlap. This technique strikes a balance, trapping moisture while promoting necessary air flow. When using burlap, ensure it is damp but not soaking, and it should not directly compress the mushrooms—allow some space for air circulation.
When it comes time to water, patience is your ally. Use room-temperature water to avoid shocking the mycelium, and let tap water sit out beforehand to reduce chlorine content—a substance mushrooms dislike. A gentle misting technique is often preferable to pouring water directly, as it minimizes the risk of over-saturation.
By following these tips and being mindful of your mushrooms’ environment, you’ll create a nurturing space that supports their growth without the pitfalls of overwatering or excessive chlorine exposure.
Pest & Disease Control
Growing mushrooms indoors attracts a number of crop-damaging pests, such as:
- Cecid Fly — Multiplies rapidly and is rarely seen. Feeds on stipe, gills, and mycelium of mature mushrooms.
- Phorid Fly — Feeds on mycelium. Transmit fungal and bacterial diseases.
- Sciarid Fly — Is the most pervasive and voracious eater of mycelium and compost. It causes mushrooms to become brown and leathery.
- Nematodas — Their presence means there’s a problem in sanitation processes.
- Other pests such as beetles, spider mites, and larvae.
A foundational step in combating these pests is thorough sanitation and the pasteurization of your growing substrate. Pasteurizing your substrate by heating it to 140 degrees Fahrenheit for about four hours can kill off harmful organisms without depleting the nutrients needed by your mushrooms. This process is crucial, whether you’re using traditional soil or other materials like sawdust or straw.
Regular cleaning and sterilizing of your cultivation area and equipment also play vital roles in maintaining a pest-free environment. For pests that might still pose a problem after these preventative measures, exploring additional strategies like biological control or physical barriers can provide further protection.
Always prioritize safety when handling substrates at high temperatures to avoid any risk of injury or damage. By implementing these comprehensive pest management practices, you can significantly reduce the risk of pests and ensure a healthy mushroom crop.
Fertilizers
When it comes to fertilizing your mushrooms, less is more. Mushrooms primarily thrive on the nutrients within their substrate, especially in controlled environments like home growing kits. For those cultivating mushrooms in outdoor settings or in homemade substrates, ensuring the substrate is rich in organic matter from the start is key. A well-prepared mix of hay, straw, and manure can provide the necessary nutrients for mushroom growth.
If you’re exploring additional nutritional support, proceed with caution. Unlike traditional plants, mushrooms are sensitive to changes in their environment, including nutrient levels. Any supplemental feeding should be extremely diluted and applied sparingly to avoid disrupting the delicate balance mushrooms need to thrive.
Remember, the best approach is to start with a nutrient-rich substrate, minimizing the need for any external fertilization. This method ensures your mushrooms have everything they need from the beginning, promoting healthy growth without the risks associated with over-fertilization.
Pro Tip: Don’t use too much to not disturb the mushroom growth. Repeat the process for 2 to 3 weeks until you need mycelium.
How Are Mushroom Growing Kits Better for Newbies?
Mushroom growing kits are an ideal starting point for novices, offering a straightforward path to successful cultivation. The appeal lies in their simplicity: kits require minimal equipment and space, allowing you to embark on your mushroom-growing journey with ease, even in your living room.
Oyster mushrooms are among the most common kits due to their resilience and ease of growth, but varieties like lion’s mane are also available, catering to diverse tastes and interests.
Upon arrival, your kit includes a pre-colonized fruiting block, simplifying the initial setup. This block is key to the high success rate of mushroom cultivation with kits, as it removes the complexity of starting from spores. Your primary task is to make an incision in the covering plastic and provide occasional misting, paying attention to placement for optimal growth conditions.
These kits not only demystify the process but also offer a tangible, delicious reward for your efforts. With proper care, including maintaining humidity and avoiding direct sunlight, you may even enjoy multiple harvests from a single kit. The thrill of watching your mushrooms sprout and tasting your very own harvest is an experience that often sparks a lasting passion for mushroom cultivation.
You Too Can Become a Mushroom Farmer with a Mushroom Growing Kit
Mushrooms have a mouth-watering taste and are an excellent source of dietary fiber, protein, vitamins, and other healthy nutrients. Not only that, but they have health benefits, such as decreasing the risk of obesity and heart disease.
There’s no reason why you, too, can’t enjoy all the mushroom benefits with a mushroom growing kit. It’s extremely easy to use, it requires minimum involvement on your part, and you’ll have multiple mushroom harvests. It’s also a fantastic and original Christmas gift idea.
Get familiar with the mushroom life cycle and the cultivation process, and for a plentiful mushroom flush, apply all the tips and tricks I’ve outlined above.
Happy mushrooming!