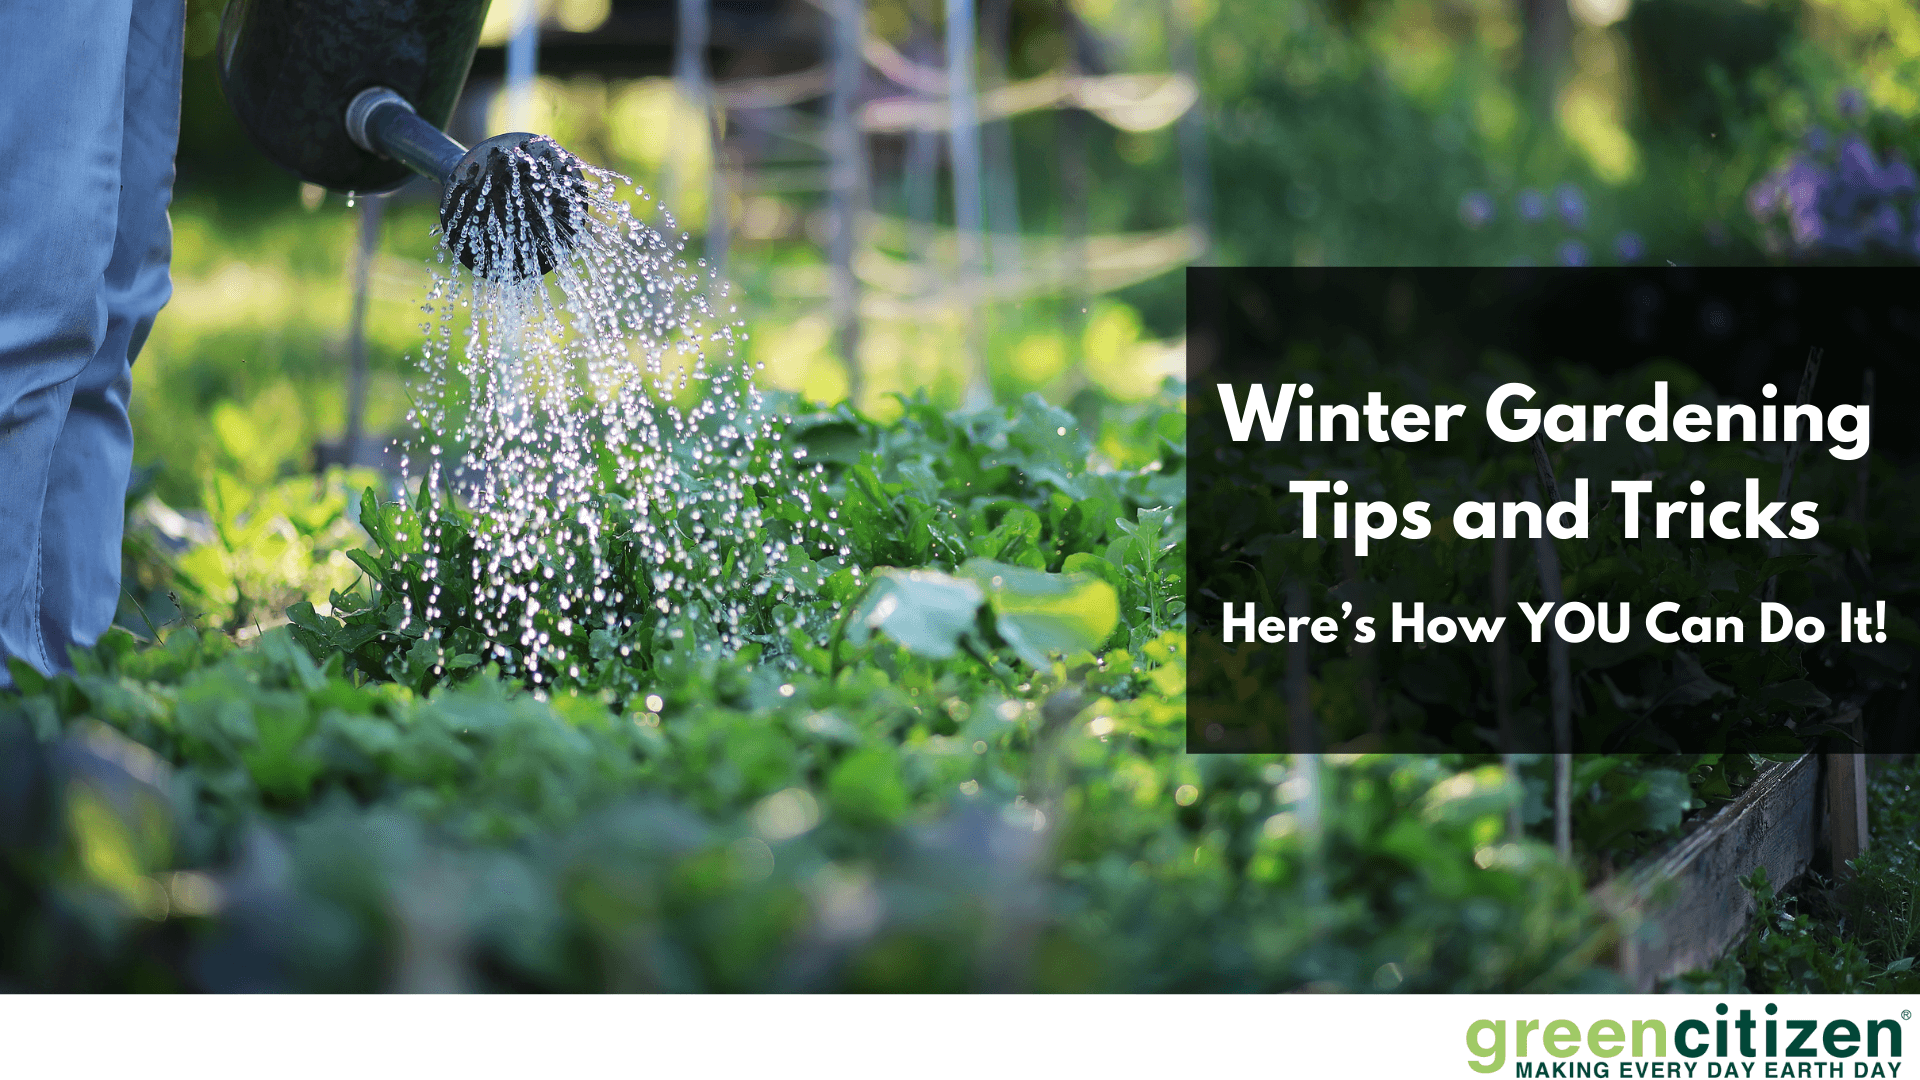
I’ve been growing a lot of my family’s own food for many years now. And while it was always a fun family activity in early spring until the fall, winter gardening was one challenge that took a lot more planning and work.
My first attempt at becoming a winter gardener failed miserably, and I almost gave up on the idea.
But a horticulturalist friend gave me some valuable advice on how to approach winter crops the right way. And over a few years of trial and error, I’ve figured out the best crops, techniques, and equipment to better deal with the winter months.
OK, let’s see how you can extend your growing season.
4 Common Routes to Winter Gardening
Most people tend to harvest their last crops in October and then simply prepare perennial plants for winter temperatures. They lie dormant for a few months and come back to growing in the spring.
But with just these four simple tips, you can extend your food harvest well into November and December.
1. Late Fall Harvest
Many crops that you grow throughout the summer will continue to grow even in cold temperatures if you sow seeds a lot later. I’ll get to many examples shortly, but by seeding tomatoes or bell peppers in August, you’ll still get a good winter harvest in November.
Once the long and warm days of the summer are over, the growth will slow down, but you can take advantage of that. Where you might normally have your first crop within six weeks, it might take 10 to 12 weeks for a late harvest.
This also works well with leafy greens and root crops that can withstand the temperatures of early winter.
2. Early Winter Harvest
This can sometimes be a bit of a hit-and-miss exercise as some of the fast-growing crops might require more sunlight than you’ll get. But, as you clear away annual crops, try to plant things like lettuces, radishes, peas, and turnips.
If your late fall and early winter are relatively mild with plenty of daily sunshine, then you can still get some amazing winter harvests. One thing you might want to do is plant these crops in pots outside.
If cooler temperatures come earlier than expected, or you get less sunshine, and the crop growth slows down, then you can bring the plants indoors and place them near a window.
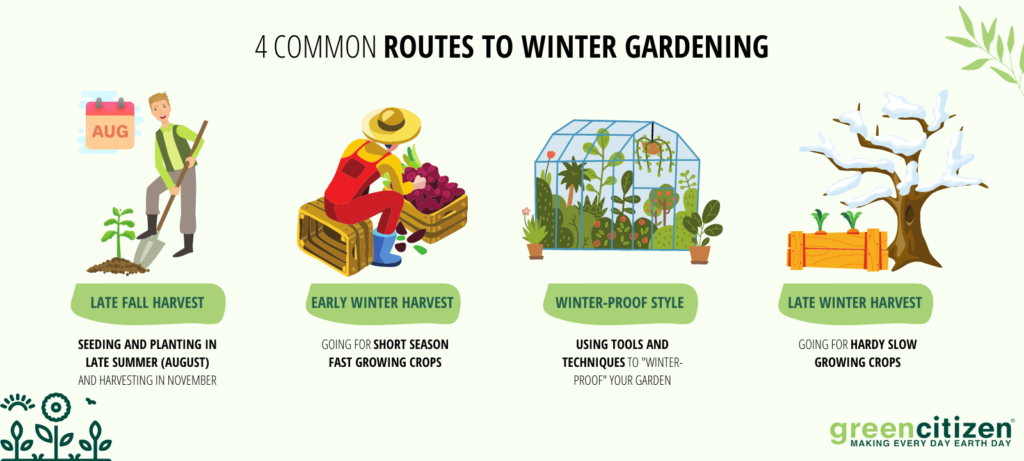
3. “Winter-Proof” Style
The best way to protect plants from cold weather is to cover crops with a few simple pieces of equipment.
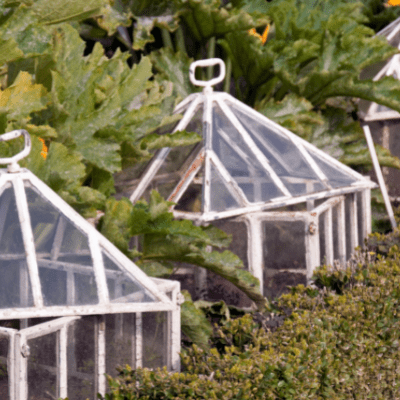
The simplest thing you can do is buy or make a cloche or a cold frame like this one. They are simple and fast to set up, and you can move them to different areas as you harvest crops.
My personal experience has shown that cold frames are worth the extra investment, especially if you have some raised garden beds.
They cover a larger area, and you can keep all your crops together in one place.
The next step up from cold frames would be a greenhouse, and I’ll get to some options there shortly.
4. Late Winter Harvest
For the colder temperatures in the middle of winter, you’ll need to plant some hardier crops that grow slowly in the summer as well.
Some good examples are onions, cauliflower, and garlic, but certain types of broccoli can do pretty well too. The idea is to plant them in September so that they get a bit established before the days get too short.
As long as they get some reasonable daytime temperatures and a bit of sun, they should keep growing. I’ve often been able to harvest these in the late winter season. And the best thing is that you don’t need dedicated winter gardens.
A simple cold frame is all you need to keep overwintered crops alive and growing.

Winter Gardening 101: Which Crops Work Out The Best?
The best advice I got to make winter gardening successful was all about learning how fast different winter crops will grow. Once you understand these concepts, then you can time your planting better to have a sustainable food supply from late summer to late winter.
Here’s what to consider for winter harvests.
Slow Maturing
These are often called overwintered crops as they can take over three months to mature. So, if you plant them in November under a cloche or cold frame, then they could be ready before early spring.
Some of the options tend to work better when you plant them in October, which could be great timing for a Christmas dinner with homegrown veggies.
If you have a high chance of sustained below-freezing temperatures where the ground will completely freeze, then these root crops might need to go into covered winter gardens or raised beds with some frost protection.
Here are the vegetables that I have had the greatest success with, along with the varieties to get:
- Onions (Walla Walla)
- Brussels Sprouts (Jade Cross)
- Carrots (Autumn King, Oxheart, Danvers, Scarlets)
- Beets (Albina Verdana)
- Cabbage (January King, Marabel)
- Parsnip (Hollow Crown, Lancer)
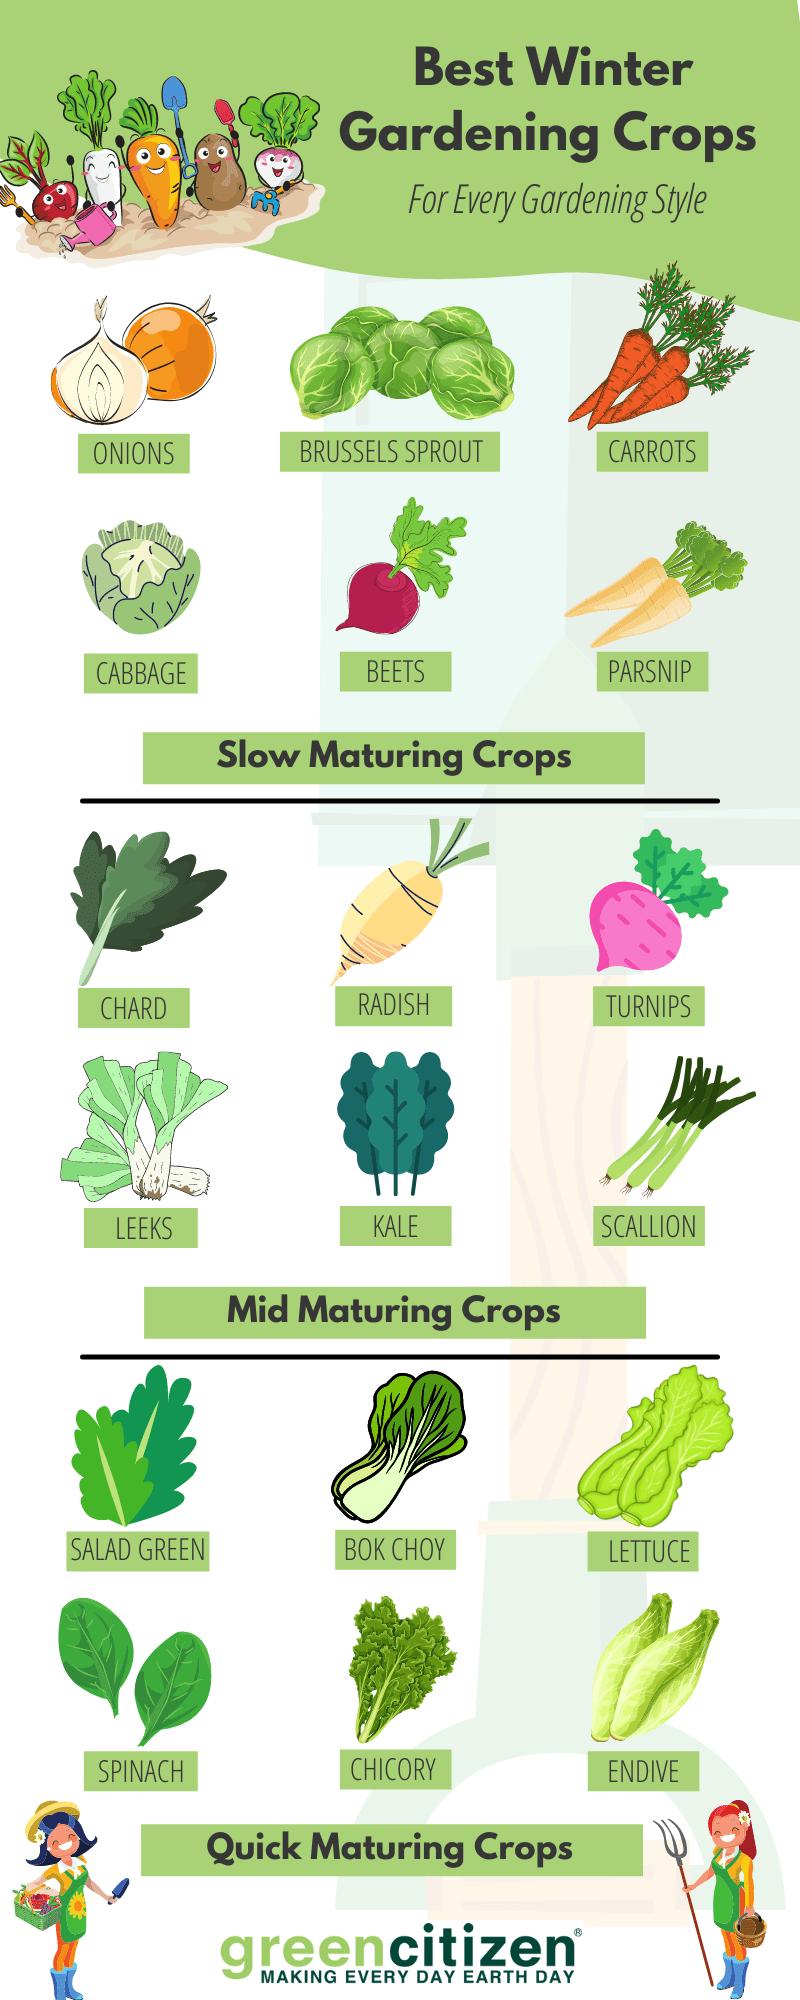
Mid Maturing
These types of winter vegetables will usually take about two months to fully mature, but if you have particularly short and cold winter days, then they could take up to three months.
What I have done before is plant one batch in September and another in late October. That way, I can get a more constant supply in November and December.
You’ll have a mix of leafy greens and some root vegetables as well. Even the hardy frost-resistant ones will need some protection from temperatures consistently below freezing. That means, if you live in a Northern climate where it starts to freeze in late November and doesn’t go above freezing until spring, you’ll need to take additional steps.
What will happen to root vegetables in constantly frozen ground is that they will go dormant.
I’ll get to some specific tools and how to use them shortly.
Here are my favorite vegetables and the specific types I’ve had success with.
- Chard (Fordhook Giant, Verde del Taglio)
- Radish (Daikon, Cherry Belle, Tinto)
- Turnips (White Egg, Golden Globe, Coletto Viola)
- Leeks (Lincoln, Lexton, King Richard, Alaska, Bandit)
- Kale (Siberian, Winterbor, Westland Winter)
- Scallion (White Lisbon)
- Collards (Winner, Blue Max, Morris Heading)
Quick Maturing
Here are some ideas if you’ve left it a bit late to prepare for a winter harvest. This happened to me the first year I planted food in November, but I still had a bit of a high-five moment with my kids before Christmas.
The plants in this category would typically take about 40 to 50 days to mature. I personally haven’t had the same luck starting with these at the end of December, and that would mainly be down to the very limited amount of direct sunlight my cold frames and greenhouse get at that time.
These are the fastest maturing crops:
- Salad Green (Watercress, Winter Purslane, Escarole)
- Bok Choy (Mei Qing Choi)
- Lettuce (Winter Density, Romaine)
- Spinach (Winter Bloomsdale, Giant Winter, Olympia)
- Chicory (Sugarloaf, Radicchio)
- Endive (President)
How to Protect Your Winter Garden?
Keeping your crops safe from cooler temperatures is something you have to carefully plan, even if you have a winter garden or greenhouse.
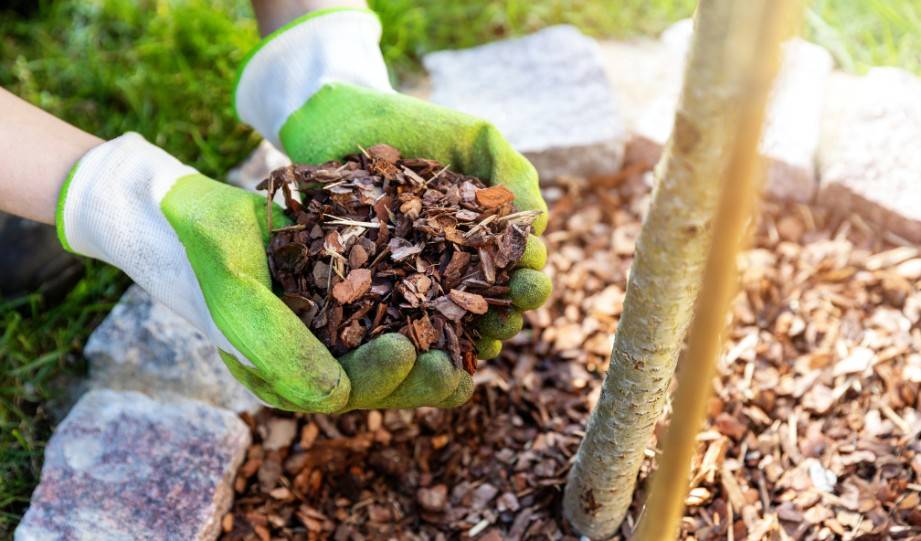
Mulch
I always add about 2 inches of mulch on top of the soil around the overwintering crops. I do this with leaves, straw, and pine needles that I gather in the fall.
You can pat these down to reduce the number of air pockets, but don’t compact it too much.
Another little trick is to cut the branches off your Christmas tree in January and leave them to dry. 11 months later, they will easily fall off by just rubbing the branches together.
Cloche
A cloche is a much cheaper option than a cold frame, and this cloche is the one I always keep in stock.
If you don’t live in extremely cold weather, then a simple bell-shaped cloche will offer plenty of protection for winter vegetables.
Just keep in mind that even the larger ones might not work for things like tomatoes or peppers as those plants tend to grow taller.
But for any root vegetables or leafy greens, this is an inexpensive way to plant crops in the winter.
Also, using cloche is unbelievably easy — great for newcomers.
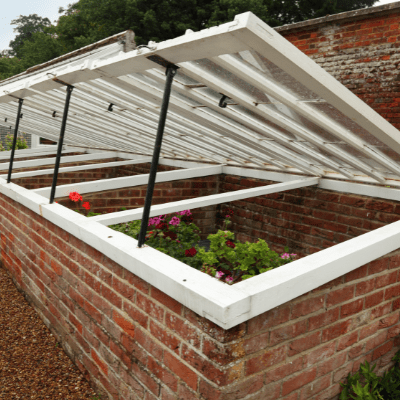
Cold Frame
Long before I invested in a greenhouse, I spent a few dollars on a cold frame. And I still use my favorite one to this day.
I can easily pack it up in spring, and as soon as I notice the cool weather in mid-November, it’s back up again before the ground freezes.
A cold frame is essentially a mini greenhouse that uses plastic or bubble wrap sheeting to provide frost protection while still letting in sunlight.
Some of them come with a planting box or raised bed, but I prefer the ones that you can use with your existing growing areas.
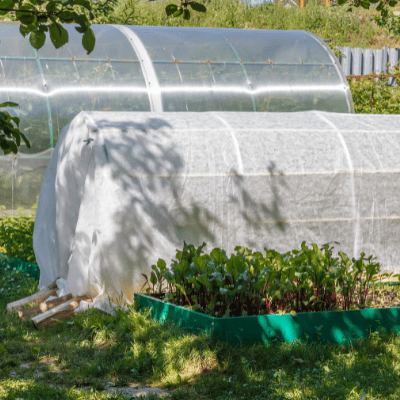
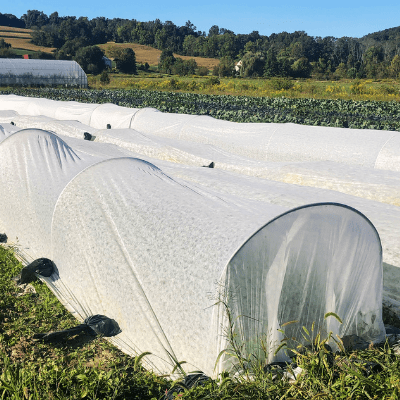
Hoop Tunnel
This is a step up from a row cover, but at the same time, it’s substantially cheaper and more flexible than a greenhouse.
A hoop tunnel is a set of rust-free u-shape bars that you set into the ground.
You then cover the bars with a heavy plastic sheet that provides frost protection as the weather cools.
For hardy vegetables, these can often be all you need, and they are easy to disassemble in spring.
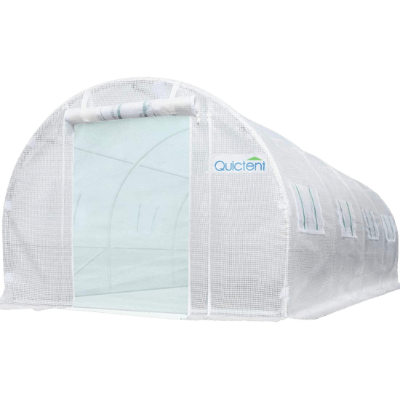
Winter Greenhouse
The most expensive thing you could go for is a heated greenhouse. But you really only need these when temperatures dip extremely low.
The downside is that they use a lot of energy, and in some cases, the heating system won’t be able to keep up when temperatures drop very low.
I personally have an unheated greenhouse.
And if the cold season becomes extremely frosty, then I add cloches or row covers inside the greenhouse.
Here is a simple one you can get started with that won’t break the bank.
Hot Bed
You can also buy cold frames with heated beds. They can ensure that roots don’t get damaged by freezing temperatures, but they are very inefficient. The amount of energy you would need to invest would give your winter crops a huge carbon footprint.
You’re better off sticking with hardy greens that will stand up to frost and just ignore the more tender plants.
Row Cover
Row covers are a type of fleece blanket that you can use to cover your plants from freezing winds. They also raise the temperature slightly at ground level, which might help to avoid frost damage to roots.
The great thing is that they don’t cost much, and this is the one I’ve ordered a few times.
What I also like about row covers is that you can reuse them for multiple years. Just be careful how you pull them up to avoid tears.
You can also use a floating row cover from mid-August to late summer to provide some shade if you are heading into a particularly hot summer.
How to Keep Your Winter Greenhouse Temperature at Optimum Level?
Ultimately, I recommend that you invest in a good greenhouse to be better prepared for winter weather. But even then, there are a few things you can do to slightly increase temperatures inside for the winter months.
Store Water Containers
I collect rainwater that runs off the greenhouse in a large barrel. Normally, that barrel is outside, but in winter, I fill it completely and place it inside the greenhouse.
What this does is add thermal mass, and it might help to increase the air temperature a little to avoid frost damage.
Darken The Ground
It only takes a small amount of direct sunlight to heat up a dark area of soil. What you can do to take advantage of that solar heat is to place dark mulch on the soil. Even in freezing temperatures, it will keep the frost from penetrating too deep into the soil and reduce root damage.
Cover Plants
Even when you plant varieties of vegetables that can withstand frost, you might want to protect those winter crops with garden fleece blankets. Now, this will take a bit of work in a greenhouse.
While those blankets will ensure the plants are properly protected during the night, they might add too much shade during the day. Aim to place them over your crops once it gets dark, and then remove them again in the morning.
Add Insulation
Some people suggest buying specialist horticultural bubble wrap, but to be honest, you can buy any kind of large bubble wrap to do this.
I attach this to the inside of my greenhouse in late fall. The advantage of the large bubbles is that they leave in enough sunshine on sunny days but create an insulation barrier for plants during the night.
Use Solar Heaters
If you deal with extreme temperatures for several weeks and months, then the only last resort you have is a solar heater.
The reason I suggest using solar-powered heaters is that you don’t want to be adding to your carbon footprint. But, these things cost quite a bit of money, so you’d really want to make sure that it’s going to be worth it.
Winter Garden Watering: How to Do It Properly?
Another important part of winter gardening is to understand what kind of watering you need to plan to grow food. Here are some tips I have based on some simple errors I made.
How Often Should You Water In Winter?
In the cold season, you won’t need to water anywhere near as often, even when it remains dry for an extended time. First of all, plants will grow slower, and some will even go dormant.
That means they simply don’t have as much nutrient and water needs.
But because of the lack of sustained high temperatures and less direct sunlight per day, the soil will hold the moisture for a lot longer. For outdoor plants, you can reduce watering to about once a month, but I would suggest buying a moisture meter to periodically check if you need to add some water.
What’s The Best Timing For Watering?
Timing your watering schedule is just as important as figuring out how much water your crops will need. And the results of when you water will make a huge difference on how well especially leafy greens like winter lettuces survive.
The number one rule is to never water your crops in freezing temperatures. The water will quickly turn into solid ice, and that causes a lot of damage to roots and leaves.
The solution is to ideally only water the soil around the plants at a time when there is a lot of sunshine. That gives the water a chance to penetrate deep enough not to cause problems before the temperatures drop at nighttime.
What About Your Greenhouse?
You’ll need to water your greenhouse crops all winter long, but again on a reduced schedule. Rain and snow won’t get into your greenhouse, and even on cold days, the sunshine can start to dry out the soil.
I tend to water my greenhouse crops about every one to two weeks, depending on how warm it gets inside.
7 Dead-Simple Winter Garden Tips
And finally, I have a few simple winter gardening tips that will increase your chances of having fresh produce from early fall until spring.
1. Invest In Seed Trays
Keep your winter crop seedlings separate from all others by having designated seed trays for them. What I generally do is have a separate tray for each type of plant. That makes it easier to separate them, water them as needed, and then plant them into larger containers once they have grown enough.
2. Take Advantage Of Your Garden Shed
When the first frost hits, you’ll especially need to protect those seedlings. If you have trays with transparent plastic covers, then they might do OK for minor frost. But many vegetables will quickly die off if they are too young.
3. Try Using Raised Garden Beds
Start planting out your seedlings in raised beds once they are established enough. This is particularly important in early fall if your climate has a lot of rainfall. When young plants end up in saturated soil, it can be just as damaging as frost.
You need to account for all climate considerations, and raised beds give you the greatest flexibility.
4. Create Natural Wind Protection
Any plants that you keep outside for the winter are mainly exposed to frost damage from freezing winds. One thing I learned a few years ago was to plant up shrubs and rose bushes around my herb and vegetable patches.
They create a natural windbreaker and also offer some shade in the summer months.
But you’ll need to get these planted early in the year; there’s no point doing this in fall or winter.
5. Plant A Cover Crop
A cover crop is not something you aim to harvest. But for any patches of land that you use for a summer crop, it’s a good idea to replenish the soil in the winter with cover crops.
Rye and clover are two simple things you can add that will stand the best chances of surviving the winter and then adding nutrients back into the ground.
6. Replenish Your Compost
If you’re planting for a winter harvest in pots, raised beds, or a greenhouse where you’ve just harvested your summer crops, then make sure you mix in fresh compost.
Summer crops drain a lot of nutrients from the soil, and that will limit how much success you’ll have in winter. You can also add some natural fertilizers like manure or even seaweed to give the solid a nitrogen boost.
7. Control Those Weeds
There are many weeds that will take full advantage of those protected areas that you have created. Any hint of the right conditions and they will thrive and drain the soil of nutrients. Some will also block out some of the sunlight, which will limit your crop growth.
The good thing is that they won’t be quite as invasive as in the summer, so just check every few days and pull them out when they are still small.
Final Thoughts
Achieving a winter-long harvest takes a bit of planning and some simple pieces of equipment, but the rewards are amazing. Whether you go for simple cloches, a cold frame, or a full-size greenhouse, you have plenty of options to start winter gardening.
There are plenty of crops that may be just what you need to make your Christmas dinner that bit more special. And with the above recommendation of plants, you should have more than enough to get started.
Try out these tips for yourself and post any questions you have in the comments section below.