Step into the world of eco-friendly soap making and see how simple ingredients can lead to big environmental impacts.
In today’s world, adopting eco-friendly practices in our daily routines is more than a trend—it’s a necessity. Bathing, a routine as old as humanity itself, offers a unique opportunity for environmental stewardship.
As someone who’s spent years perfecting the art of soap-making, I’ve learned that even the smallest changes can have a significant impact. That’s why I’m excited to share my knowledge and passion for eco-friendly solutions through this guide.
My goal is to provide you with a straightforward, easy-to-follow approach to making your own eco-friendly soap at home. Let’s embark on this green journey together, transforming our routines into acts of kindness towards our planet.
The Basics of Soap Making
Soap making is an ancient craft that combines science and art. The process involves mixing fats and oils with lye (sodium hydroxide) to trigger saponification, where these ingredients chemically react to form soap and glycerin.
This transformation is fascinating and requires precision in measurement and temperature control to ensure a successful batch.
Choosing the right, sustainable ingredients is crucial not just for the quality of the soap but for its environmental impact.
Sustainable ingredients are those that are responsibly sourced, organic, and have a minimal carbon footprint.
By selecting oils, lyes, and additives that align with these principles, soap makers can create products that cleanse effectively without harming the planet.
This attention to ingredient selection ensures that the soap is not only gentle on the skin but also contributes to a healthier ecosystem.
Gathering Your Eco-Friendly Soap Supplies
Ingredients
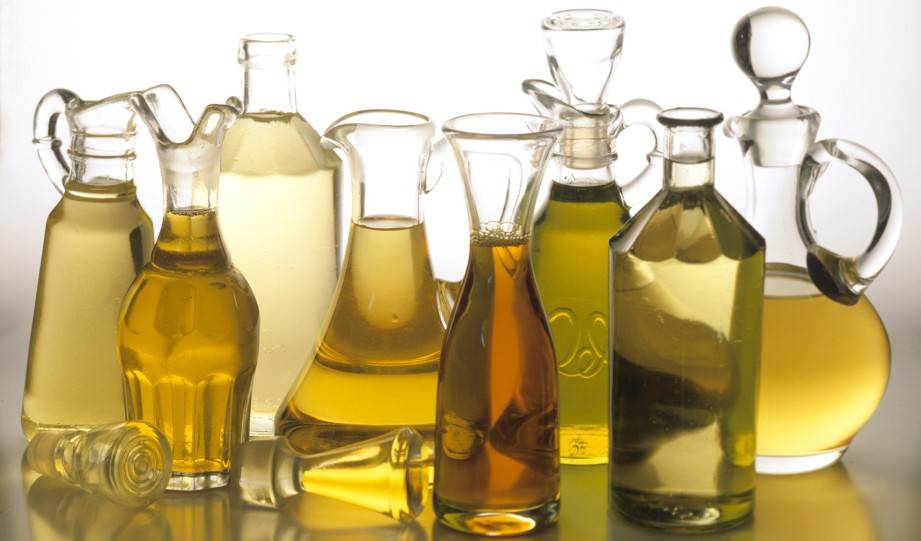
When embarking on the journey of eco-friendly soap making, the choice of ingredients is paramount. You’ll need natural, organic ingredients that are kind to both your skin and the planet. Here's a breakdown:
1. Oils: Olive, coconut, and castor oils are staples for their moisturizing properties and sustainable sourcing options. Olive oil provides a gentle, conditioning base, coconut oil contributes to the soap's hardness and lathering ability, and castor oil boosts lather.
2. Lye (Sodium Hydroxide): Essential for saponification, the chemical reaction that creates soap. Always look for lye from responsible suppliers to ensure it’s produced in an environmentally friendly manner.
3. Essential Oils: For scent, opt for organic essential oils like lavender, peppermint, or tea tree. These provide natural fragrances without the environmental toll of synthetic scents.
Sourcing these ingredients sustainably is crucial.
Look for suppliers who prioritize organic farming practices and ethical sourcing.
Local health stores or online marketplaces dedicated to natural products often also offer the quality and transparency needed for eco-friendly soap making.
Remember, the goal is to minimize environmental impact while creating a product that’s gentle on the skin and effective in cleaning.
Equipment
The right tools can make the soap-making process both enjoyable and eco-friendly. Here’s what you’ll need:
1. Digital Scale: Precision is key in soap making, so a reliable digital scale is essential for measuring your ingredients accurately.
2. Thermometer: A thermometer ensures your lye and oils are at the correct temperatures before mixing, crucial for the saponification process.
3. Mixing Bowls and Utensils: Opt for stainless steel or glass, as these materials are durable and won’t react with your ingredients. Plus, they’re easy to clean and reuse.
4. Mold: Silicone molds are great for beginners and experienced soap makers alike. They’re reusable, easy to clean, and come in various shapes and sizes.
5. Safety Gear: Gloves and goggles are non-negotiable to protect your skin and eyes from the lye.
Focusing on reusable and sustainable options not only reduces waste but also ensures the longevity of your soap-making tools.
Investing in quality equipment from the start means less replacement and less environmental impact over time.
Step-by-Step Guide to Making Your Eco-Friendly Soap
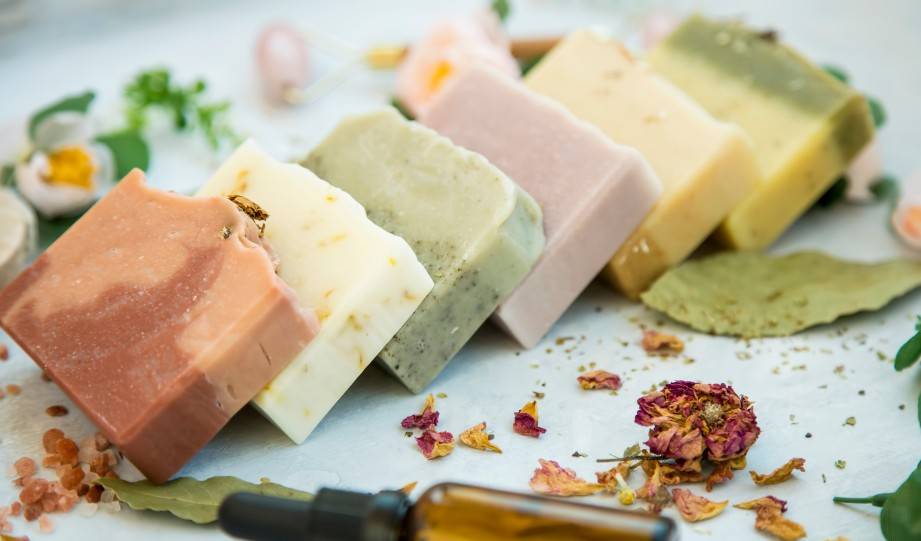
Preparation
Before diving into the creation of your eco-friendly soap, it's crucial to prioritize safety and organization.
Start by donning your safety gear: wear gloves and goggles to protect against lye, a necessary but caustic ingredient.
Ensure your workspace is well-ventilated, clean, and free of any food items or utensils that are not dedicated to soap making.
Cover your work surface with newspaper or a reusable cloth to catch any spills.
Having all your ingredients and equipment within easy reach will streamline the process, making it safer and more enjoyable.
Mixing Your Ingredients
The key to successful soap making lies in the precise mixing of oils, lye, and water. Here's how to do it right:
1. Measure Accurately
Use your digital scale to measure the oils, lye, and water. Precision is crucial for the chemical reaction to occur correctly.
For a basic soap recipe, the quantities of oil, lye, and water can vary depending on the specific oils used and the desired properties of the finished soap.
However, I'll provide a simple recipe that's great for beginners. This recipe will produce a mild, cleansing soap with a good balance of hardness, cleansing power, and moisturizing properties.
Olive Oil: 600 grams (about 60% of total oils)
Coconut Oil: 300 grams (about 30% of total oils)
Castor Oil: 100 grams (about 10% of total oils)
Water: 380 grams
Lye (Sodium Hydroxide): 143 grams
This recipe is designed for a batch size of approximately 1 kilogram of soap, before curing.
The proportions of oils can be adjusted to change the characteristics of the finished soap. For example, increasing coconut oil will increase the lather, but too much can be drying to the skin.
2. Mix Lye and Water
In a well-ventilated area, slowly add the lye to the water (never the other way around) in a glass or stainless steel container.
This mixture will heat up quickly and release fumes, so avoid inhaling directly.
Allow it to cool to the recommended temperature, usually between 95°F to 105°F.
3. Heat Oils
Gently heat your oils in a stainless steel pot until they reach a similar temperature to the lye-water mixture.
Consistency in temperature helps ensure a smooth blend and a successful saponification process.
4. Combine Lye Water with Oils
Once both mixtures have reached the correct temperature, slowly pour the lye water into the oils, stirring constantly.
Use a stick blender to mix until the batter reaches "trace," which means it's thick enough to leave a mark when drizzled over itself.
The importance of temperatures and consistency cannot be overstated.
Too hot or too cold, and your soap may not set properly; too fast or too slow in mixing, and you could end up with a separated batch.
Patience and attention to detail are your best tools here.
Molding and Curing
After achieving trace, it's time to pour your soap mixture into molds. Silicone molds are highly recommended for their ease of use and versatility.
Gently pour the soap batter into the molds, ensuring it's evenly distributed. Tap the molds lightly on your workspace to remove any air bubbles.
Cover the molds with plastic wrap to help retain heat, which is beneficial during the initial saponification phase.
Then, wrap them in towels for insulation and set aside in a safe, undisturbed area.
The soap needs to cure, which means allowing it to harden and the saponification process to complete.
After 24-48 hours, you can unmold your soap. It will still be somewhat soft at this stage. Place the bars in a cool, dry area with good air circulation to cure.
Customizing your eco-friendly soap with scents and colors is a delightful way to personalize your creation while maintaining its environmental integrity. Here's how to do it sustainably:
For a batch of about 1 kilogram, 15-30 grams of essential oils should suffice, depending on how strong you want the fragrance.
Natural Colorants
For colors, turn to nature. Clays, spices, and plant extracts offer a rainbow of possibilities.
Pink clay can give a soft rose hue, turmeric a vibrant yellow, and spirulina a deep green.
Mix a small amount of your chosen colorant with a little water or oil before adding to the soap mix to ensure even distribution.
When adding scents and colors, timing and moderation are key.
Adding them too early or in excessive amounts can affect the soap’s texture and curing process. Aim for a balance that respects the natural beauty and integrity of your ingredients, enhancing your soap without overpowering it.
This approach keeps your soap truly eco-friendly, celebrating the colors and scents nature provides.
Molding Options and Shapes
The choice of mold can add a unique touch to your homemade soap, turning it into a personal or decorative statement. Beyond traditional soap molds, there are many creative and eco-friendly options:
Silicone Baking Molds
Available in a variety of shapes and sizes, silicone molds are versatile, reusable, and perfect for soap making.
From flowers to geometrical shapes, they allow for detailed designs.
Upcycled Containers
Look around your home for potential molds. Yogurt pots, milk cartons, and take-out containers can be cleaned and repurposed into soap molds.
This not only reduces waste but also gives your soap unique and interesting shapes.
Wooden Boxes
For a rustic look, wooden molds are ideal. You can either craft your own from reclaimed wood or repurpose small, shallow boxes.
Lining them with parchment paper makes removing the soap easy.
PVC Pipes and Pringles Cans
For circular soaps, PVC pipes or cleaned Pringles cans work well. They’re great for creating soap bars that can be sliced to your preferred thickness.
Tips for Long-Lasting Bars and Minimal Waste
Caring for Your Homemade Soap
To ensure your eco-friendly soap lasts as long as possible while maintaining its quality, proper storage is key. Here are some tips:
Let it Breathe
Store your soap in a well-ventilated area away from direct sunlight and humidity. This helps it dry between uses, extending its lifespan.
Drain Well
Use a soap dish with drainage to prevent your soap from sitting in water, which can make it mushy and shorten its life.
Cure Properly
Before using or gifting your soap, allow it to cure for 4-6 weeks. This process hardens the bar, making it last longer in the shower.
Keep Dry
In humid environments, consider storing your soap in a linen bag or wrapping it in wax paper to absorb excess moisture.
Zero-Waste Packaging and Gifting
Presenting and gifting your homemade soap in an eco-friendly manner reinforces the sustainable ethos behind its creation. Here are some zero-waste packaging ideas:
Fabric Wraps
Use pieces of fabric, such as scraps from old clothes or towels, to wrap your soap.
This method, inspired by the Japanese Furoshiki, adds a personal touch and can be reused by the recipient.
Recycled Paper
Wrap your soap bars in recycled brown paper or newspaper. It’s simple, classic, and compostable.
Twine made from natural fibers can add a rustic finish without adding waste.
Reusable Tins or Boxes
Small metal tins or cardboard boxes can be a charming way to present your soap.
They’re perfect for gifting and can be repurposed by the recipient for storing small items.
Natural Elements
Decorate your soap with natural elements like dried flowers, cinnamon sticks, or twine.
These materials complement the eco-friendly theme and add beauty without waste.
The shift to eco-friendly soap is more than a personal preference; it's a necessary step towards environmental conservation.
Commercial soaps often contain harsh chemicals that, when washed down our drains, can lead to chemical runoff, adversely affecting aquatic ecosystems and water quality.
Furthermore, the plastic packaging prevalent in commercial soap products contributes significantly to global plastic waste, harming marine life and polluting our oceans.
In contrast, homemade soap crafted with natural, biodegradable ingredients minimizes environmental harm. It breaks down safely after use, reducing chemical runoff.
Moreover, by using minimal and zero-waste packaging options, homemade soap drastically cuts down on plastic waste.
Embracing the making and use of eco-friendly soap is a meaningful way to reduce your ecological footprint, one wash at a time.
Conclusion
Throughout this article, we've explored the significant benefits of making your own eco-friendly soap, from reducing chemical runoff and plastic waste to enjoying the personal satisfaction of crafting something truly beneficial for both you and the planet.
We've covered the basics, from selecting sustainable ingredients and essential equipment to mastering the soap-making process and personalizing your creations.
Now, I encourage you to embark on your soap-making journey. It's a rewarding practice that not only nurtures your skin but also protects our precious environment.
Start small, experiment with natural ingredients, and share your eco-friendly creations with the world. Let's make a difference, one bar of soap at a time.
Eunice is a sustainability writer whose passion is sharing accessible eco-friendly practices with GreenCitizen's global readership. She enjoys birdwatching during her downtime, often deriving inspiration from nature's resilience. An enthusiastic cyclist, she is also an ardent advocate of eco-friendly transport.
Actionable Blog Posts
How to Make Eco-Friendly Homemade Soap
Written by : Eunice Rodriguez, Updated by: Samira Tasneem | Last Updated: July 15, 2024
Contents
Step into the world of eco-friendly soap making and see how simple ingredients can lead to big environmental impacts.
In today’s world, adopting eco-friendly practices in our daily routines is more than a trend—it’s a necessity. Bathing, a routine as old as humanity itself, offers a unique opportunity for environmental stewardship.
As someone who’s spent years perfecting the art of soap-making, I’ve learned that even the smallest changes can have a significant impact. That’s why I’m excited to share my knowledge and passion for eco-friendly solutions through this guide.
My goal is to provide you with a straightforward, easy-to-follow approach to making your own eco-friendly soap at home. Let’s embark on this green journey together, transforming our routines into acts of kindness towards our planet.
The Basics of Soap Making
Soap making is an ancient craft that combines science and art. The process involves mixing fats and oils with lye (sodium hydroxide) to trigger saponification, where these ingredients chemically react to form soap and glycerin.
This transformation is fascinating and requires precision in measurement and temperature control to ensure a successful batch.
Choosing the right, sustainable ingredients is crucial not just for the quality of the soap but for its environmental impact.
Sustainable ingredients are those that are responsibly sourced, organic, and have a minimal carbon footprint.
By selecting oils, lyes, and additives that align with these principles, soap makers can create products that cleanse effectively without harming the planet.
This attention to ingredient selection ensures that the soap is not only gentle on the skin but also contributes to a healthier ecosystem.
Gathering Your Eco-Friendly Soap Supplies
Ingredients
When embarking on the journey of eco-friendly soap making, the choice of ingredients is paramount. You’ll need natural, organic ingredients that are kind to both your skin and the planet. Here's a breakdown:
1. Oils: Olive, coconut, and castor oils are staples for their moisturizing properties and sustainable sourcing options. Olive oil provides a gentle, conditioning base, coconut oil contributes to the soap's hardness and lathering ability, and castor oil boosts lather.
2. Lye (Sodium Hydroxide): Essential for saponification, the chemical reaction that creates soap. Always look for lye from responsible suppliers to ensure it’s produced in an environmentally friendly manner.
3. Essential Oils: For scent, opt for organic essential oils like lavender, peppermint, or tea tree. These provide natural fragrances without the environmental toll of synthetic scents.
Sourcing these ingredients sustainably is crucial.
Look for suppliers who prioritize organic farming practices and ethical sourcing.
Local health stores or online marketplaces dedicated to natural products often also offer the quality and transparency needed for eco-friendly soap making.
Remember, the goal is to minimize environmental impact while creating a product that’s gentle on the skin and effective in cleaning.
Equipment
The right tools can make the soap-making process both enjoyable and eco-friendly. Here’s what you’ll need:
1. Digital Scale: Precision is key in soap making, so a reliable digital scale is essential for measuring your ingredients accurately.
2. Thermometer: A thermometer ensures your lye and oils are at the correct temperatures before mixing, crucial for the saponification process.
3. Mixing Bowls and Utensils: Opt for stainless steel or glass, as these materials are durable and won’t react with your ingredients. Plus, they’re easy to clean and reuse.
4. Mold: Silicone molds are great for beginners and experienced soap makers alike. They’re reusable, easy to clean, and come in various shapes and sizes.
5. Safety Gear: Gloves and goggles are non-negotiable to protect your skin and eyes from the lye.
Focusing on reusable and sustainable options not only reduces waste but also ensures the longevity of your soap-making tools.
Investing in quality equipment from the start means less replacement and less environmental impact over time.
Step-by-Step Guide to Making Your Eco-Friendly Soap
Preparation
Before diving into the creation of your eco-friendly soap, it's crucial to prioritize safety and organization.
Start by donning your safety gear: wear gloves and goggles to protect against lye, a necessary but caustic ingredient.
Ensure your workspace is well-ventilated, clean, and free of any food items or utensils that are not dedicated to soap making.
Cover your work surface with newspaper or a reusable cloth to catch any spills.
Having all your ingredients and equipment within easy reach will streamline the process, making it safer and more enjoyable.
Mixing Your Ingredients
The key to successful soap making lies in the precise mixing of oils, lye, and water. Here's how to do it right:
1. Measure Accurately
Use your digital scale to measure the oils, lye, and water. Precision is crucial for the chemical reaction to occur correctly.
For a basic soap recipe, the quantities of oil, lye, and water can vary depending on the specific oils used and the desired properties of the finished soap.
However, I'll provide a simple recipe that's great for beginners. This recipe will produce a mild, cleansing soap with a good balance of hardness, cleansing power, and moisturizing properties.
This recipe is designed for a batch size of approximately 1 kilogram of soap, before curing.
The proportions of oils can be adjusted to change the characteristics of the finished soap. For example, increasing coconut oil will increase the lather, but too much can be drying to the skin.
2. Mix Lye and Water
In a well-ventilated area, slowly add the lye to the water (never the other way around) in a glass or stainless steel container.
This mixture will heat up quickly and release fumes, so avoid inhaling directly.
Allow it to cool to the recommended temperature, usually between 95°F to 105°F.
3. Heat Oils
Gently heat your oils in a stainless steel pot until they reach a similar temperature to the lye-water mixture.
Consistency in temperature helps ensure a smooth blend and a successful saponification process.
4. Combine Lye Water with Oils
Once both mixtures have reached the correct temperature, slowly pour the lye water into the oils, stirring constantly.
Use a stick blender to mix until the batter reaches "trace," which means it's thick enough to leave a mark when drizzled over itself.
The importance of temperatures and consistency cannot be overstated.
Too hot or too cold, and your soap may not set properly; too fast or too slow in mixing, and you could end up with a separated batch.
Patience and attention to detail are your best tools here.
Molding and Curing
After achieving trace, it's time to pour your soap mixture into molds. Silicone molds are highly recommended for their ease of use and versatility.
Gently pour the soap batter into the molds, ensuring it's evenly distributed. Tap the molds lightly on your workspace to remove any air bubbles.
Cover the molds with plastic wrap to help retain heat, which is beneficial during the initial saponification phase.
Then, wrap them in towels for insulation and set aside in a safe, undisturbed area.
The soap needs to cure, which means allowing it to harden and the saponification process to complete.
After 24-48 hours, you can unmold your soap. It will still be somewhat soft at this stage. Place the bars in a cool, dry area with good air circulation to cure.
The curing process typically takes 4-6 weeks. During this time, water will evaporate from the soap, making it harder and milder for the skin.
To ensure quality during curing, turn the bars every few days for even air exposure. Avoid direct sunlight and extreme temperatures.
Patience is key during curing — this waiting period is essential for developing the best quality soap.
Read More:
How to Make Your Own Natural Toothpaste
Customizing Your Eco-Friendly Soap
Adding Scents and Colors
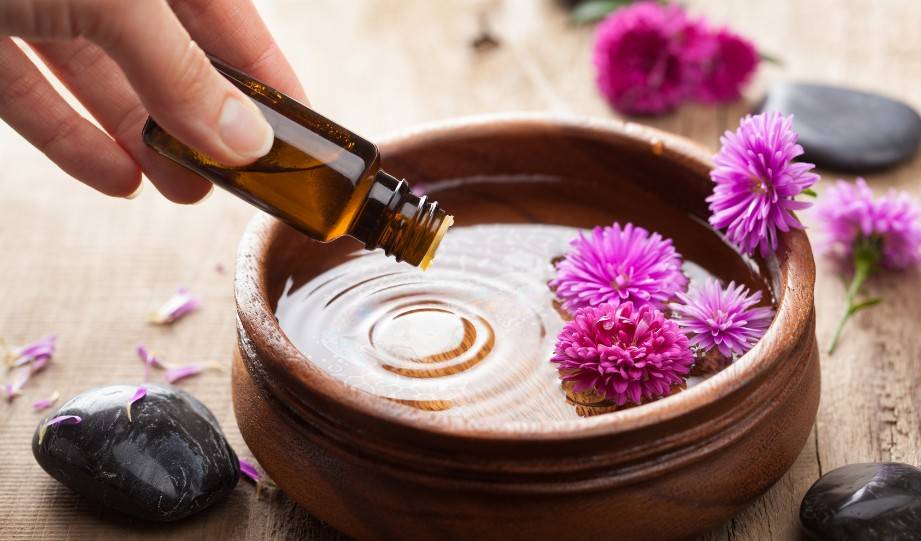
Customizing your eco-friendly soap with scents and colors is a delightful way to personalize your creation while maintaining its environmental integrity. Here's how to do it sustainably:
Essential Oils
Add essential oils for fragrance after reaching trace. Lavender, peppermint, and citrus are popular for their pleasant scents and natural properties.
For a batch of about 1 kilogram, 15-30 grams of essential oils should suffice, depending on how strong you want the fragrance.
Natural Colorants
For colors, turn to nature. Clays, spices, and plant extracts offer a rainbow of possibilities.
Pink clay can give a soft rose hue, turmeric a vibrant yellow, and spirulina a deep green.
Mix a small amount of your chosen colorant with a little water or oil before adding to the soap mix to ensure even distribution.
When adding scents and colors, timing and moderation are key.
Adding them too early or in excessive amounts can affect the soap’s texture and curing process. Aim for a balance that respects the natural beauty and integrity of your ingredients, enhancing your soap without overpowering it.
This approach keeps your soap truly eco-friendly, celebrating the colors and scents nature provides.
Molding Options and Shapes
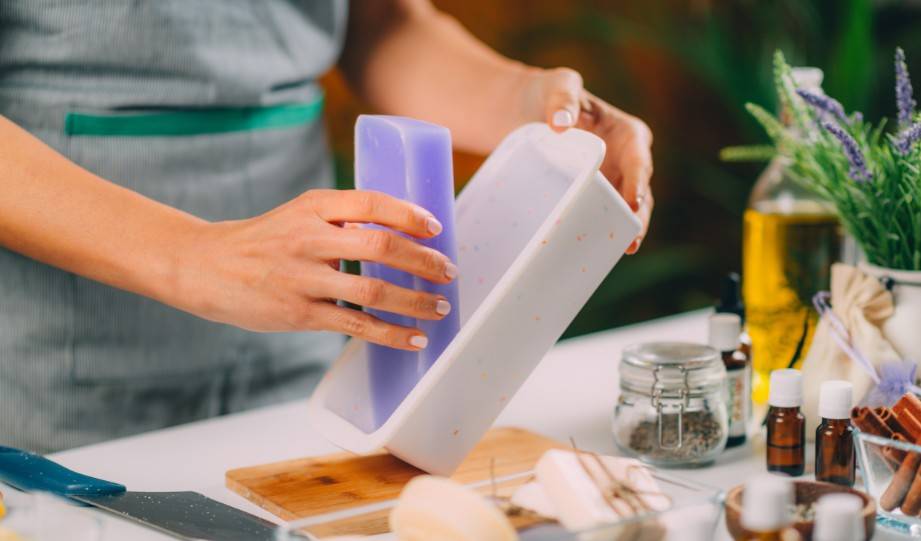
The choice of mold can add a unique touch to your homemade soap, turning it into a personal or decorative statement. Beyond traditional soap molds, there are many creative and eco-friendly options:
Silicone Baking Molds
Available in a variety of shapes and sizes, silicone molds are versatile, reusable, and perfect for soap making.
From flowers to geometrical shapes, they allow for detailed designs.
Upcycled Containers
Look around your home for potential molds. Yogurt pots, milk cartons, and take-out containers can be cleaned and repurposed into soap molds.
This not only reduces waste but also gives your soap unique and interesting shapes.
Wooden Boxes
For a rustic look, wooden molds are ideal. You can either craft your own from reclaimed wood or repurpose small, shallow boxes.
Lining them with parchment paper makes removing the soap easy.
PVC Pipes and Pringles Cans
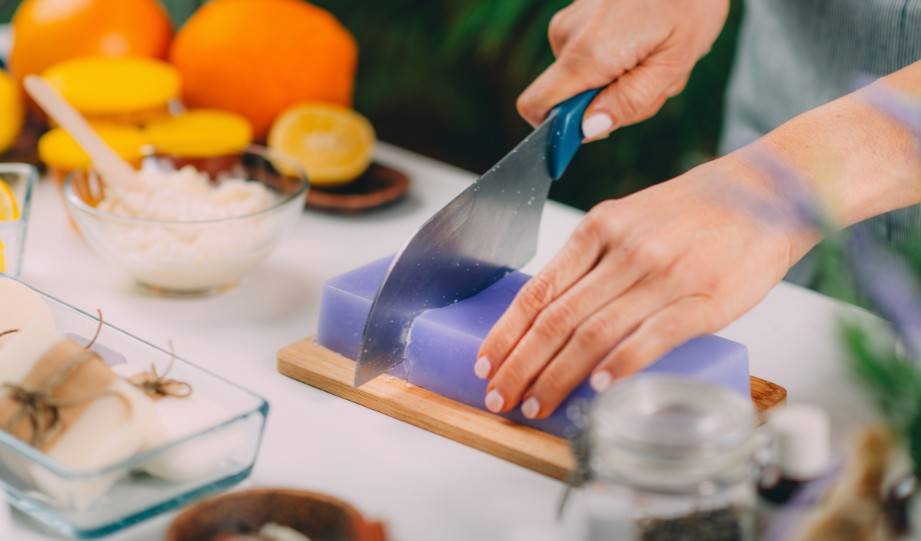
For circular soaps, PVC pipes or cleaned Pringles cans work well. They’re great for creating soap bars that can be sliced to your preferred thickness.
Tips for Long-Lasting Bars and Minimal Waste
Caring for Your Homemade Soap
To ensure your eco-friendly soap lasts as long as possible while maintaining its quality, proper storage is key. Here are some tips:
Let it Breathe
Store your soap in a well-ventilated area away from direct sunlight and humidity. This helps it dry between uses, extending its lifespan.
Drain Well
Use a soap dish with drainage to prevent your soap from sitting in water, which can make it mushy and shorten its life.
Cure Properly
Before using or gifting your soap, allow it to cure for 4-6 weeks. This process hardens the bar, making it last longer in the shower.
Keep Dry
In humid environments, consider storing your soap in a linen bag or wrapping it in wax paper to absorb excess moisture.
Zero-Waste Packaging and Gifting
Presenting and gifting your homemade soap in an eco-friendly manner reinforces the sustainable ethos behind its creation. Here are some zero-waste packaging ideas:
Fabric Wraps
Use pieces of fabric, such as scraps from old clothes or towels, to wrap your soap.
This method, inspired by the Japanese Furoshiki, adds a personal touch and can be reused by the recipient.
Recycled Paper
Wrap your soap bars in recycled brown paper or newspaper. It’s simple, classic, and compostable.
Twine made from natural fibers can add a rustic finish without adding waste.
Reusable Tins or Boxes
Small metal tins or cardboard boxes can be a charming way to present your soap.
They’re perfect for gifting and can be repurposed by the recipient for storing small items.
Natural Elements
Decorate your soap with natural elements like dried flowers, cinnamon sticks, or twine.
These materials complement the eco-friendly theme and add beauty without waste.
Read More:
10 Best Organic Shampoos For All Types of Hair
Why Eco-Friendly Soap Matters
The shift to eco-friendly soap is more than a personal preference; it's a necessary step towards environmental conservation.
Commercial soaps often contain harsh chemicals that, when washed down our drains, can lead to chemical runoff, adversely affecting aquatic ecosystems and water quality.
Furthermore, the plastic packaging prevalent in commercial soap products contributes significantly to global plastic waste, harming marine life and polluting our oceans.
In contrast, homemade soap crafted with natural, biodegradable ingredients minimizes environmental harm. It breaks down safely after use, reducing chemical runoff.
Moreover, by using minimal and zero-waste packaging options, homemade soap drastically cuts down on plastic waste.
Embracing the making and use of eco-friendly soap is a meaningful way to reduce your ecological footprint, one wash at a time.
Conclusion
Throughout this article, we've explored the significant benefits of making your own eco-friendly soap, from reducing chemical runoff and plastic waste to enjoying the personal satisfaction of crafting something truly beneficial for both you and the planet.
We've covered the basics, from selecting sustainable ingredients and essential equipment to mastering the soap-making process and personalizing your creations.
Now, I encourage you to embark on your soap-making journey. It's a rewarding practice that not only nurtures your skin but also protects our precious environment.
Start small, experiment with natural ingredients, and share your eco-friendly creations with the world. Let's make a difference, one bar of soap at a time.
Eunice Rodriguez
Eunice is a sustainability writer whose passion is sharing accessible eco-friendly practices with GreenCitizen's global readership. She enjoys birdwatching during her downtime, often deriving inspiration from nature's resilience. An enthusiastic cyclist, she is also an ardent advocate of eco-friendly transport.
Quick Links
Green Living Guides
Green Jobs
Inspiring Green News
Green Directory
Green Store
Electronics Recycling
Category: Actionable Blog Posts, Sustainable Living