
A computer recycling checklist is more than a convenience — it’s a safeguard for IT managers. Recycling old office computers isn’t as simple as calling a hauler and handing over desktops. Without preparation, companies risk serious consequences: data breaches, regulatory fines, and environmental hazards.
The risks are both historic and current. Yahoo’s 2016 breach exposed over 1 billion accounts, proving how devastating poor data handling can be.
Today in 2025, new threats like “shadow AI” are adding nearly $670,000 to the cost of a data breach. At the same time, regulators in California are tightening e-waste audits, while ESG goals put IT decisions under closer scrutiny from executives and investors.
For Bay Area businesses, this means computer recycling is no longer a back-office task — it’s a boardroom issue. Proper preparation turns disposal into a compliance-ready process that safeguards sensitive data, satisfies regulators, and proves your organization takes sustainability seriously.
Quick Computer Recycling Checklist for IT Managers
- Inventory Devices → Log make, model, serial numbers, and condition.
- Backup Data → Secure files in cloud storage or encrypted drives.
- Wipe Drives → Use certified erasure software or physical destruction.
- Remove Hazardous Parts → Separate cartridges, CRTs, and peripherals that can cause hazard.
- Prepare for Pickup → Label, pack safely, and stage equipment for transport.
- Choose a Certified Recycler → Look for R2 or e-Stewards and demand chain-of-custody reports.
- Collect Documentation → Certificates of Recycling and Data Destruction tied to your inventory.
Step 1: Inventory and Identify Computers for Recycling
The first step in any computer recycling checklist is creating a detailed inventory of all devices marked for disposal. This isn’t just a list — it’s the foundation of compliance, accountability, and ESG reporting.
Log each device with its make, model, serial number, and purchase year. For example: 25 Dell OptiPlex 7070 desktops (2020), 30 HP EliteBook laptops (2022), 10 MacBook Pros (2019), 35 keyboards, 80 mice.
Asset management tools like ServiceNow, Lansweeper, or even a structured spreadsheet make this process easier and audit-ready.
Don’t stop at desktops. Check server rooms, storage closets, and remote employee setups for forgotten devices. Include peripherals — monitors, keyboards, docking stations — since many certified recyclers process them alongside computers.
Finally, categorize each item by condition:
- Working units can be reused, resold, or donated.
- Non-working units must be recycled responsibly.
- Sensitive devices C-suite laptops, servers, or systems holding regulated data should be flagged for secure destruction.
A complete inventory ensures nothing slips through the cracks, accelerates your recycler’s process, and provides a verifiable record for auditors and sustainability officers. With this baseline in place, you’re ready for the next step: securing and preparing devices for data erasure.
💡 Pro Tip: Tag each computer with a unique identifier (barcode, asset tag, or RFID) before recycling. This not only streamlines chain-of-custody tracking but also makes compliance reporting and ESG audits far easier.
Step 2: Backup and Secure Business Data
The second step in your computer recycling checklist is safeguarding business data before devices leave your control.
Every machine should be checked for important files and business-critical records. Backups protect against accidental loss and keep teams productive long after old hardware is gone.
Choose a backup method that matches your operations:
- Cloud storage (OneDrive, Google Workspace, AWS S3) → scalable, secure, ideal for distributed teams.
- Encrypted external drives → best for short-term archives or industries that require local storage.
After backups are complete, always verify accessibility. IT managers should restore files on a different machine to confirm data isn’t corrupted or locked behind faulty encryption. Skipping this step can mean discovering missing files only after computers are recycled.
For organizations handling sensitive information — healthcare, finance, or government contracts — backups should also follow industry-specific regulations (HIPAA, PCI-DSS, GDPR, or California’s CCPA).
This may mean using approved encryption standards (AES-256) and maintaining redundant copies across secure locations.
💡 Pro Tip: Follow the 3-2-1 backup rule before recycling: keep 3 copies of your data, on 2 different storage mediums, with at least 1 stored offsite or in the cloud. This ensures business continuity even if a drive fails or an audit requires records later.
Step 3: Data Wiping and Destruction
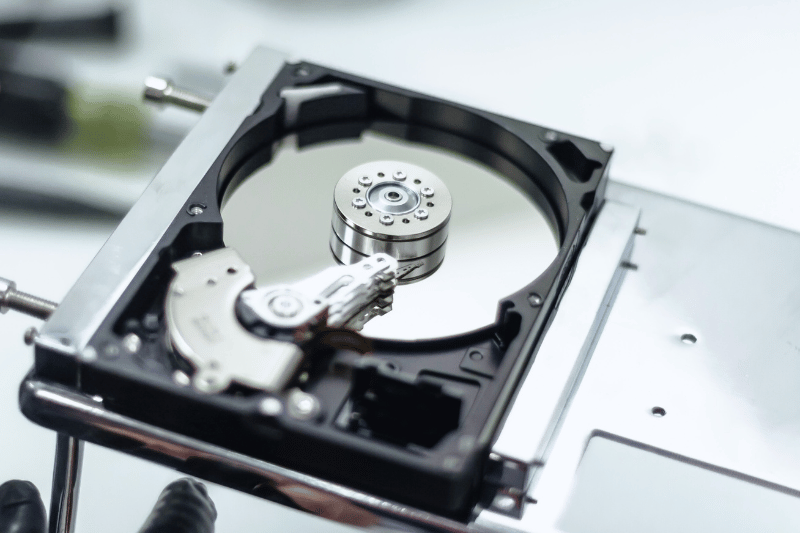
The third step in a computer recycling checklist is erasing every drive securely. A factory reset is not enough — both hard drives (HDDs) and solid-state drives (SSDs) retain fragments of sensitive data. In fact, SSDs are even trickier since data can remain in hidden memory cells. Free recovery tools make these remnants easy to retrieve.
Instead, IT managers should rely on certified data erasure software, such as:
- DBAN
- Blancco
- BitRaser
For highly sensitive systems — like finance servers or healthcare workstations — software erasure may not be sufficient. In these cases, businesses often turn to physical destruction methods such as shredding, crushing, or degaussing drives. While this eliminates all recovery risk, it also prevents reuse of the hardware.
Industry standards back this up. The NIST 800-88 guidelines and Department of Defense (DoD) 5220.22-M method both specify how media should be sanitized before disposal.
Following these ensures that your recycling process is not just safe but also audit-ready.
💡 Pro Tip: Store erasure certificates in the same system as your IT asset inventory. Linking the certificate to each device’s serial number creates an airtight audit trail for regulators and executives.
Cutting corners here isn’t worth the risk. Remember: a single data breach can cost millions in fines and reputational damage — all because an old hard drive wasn’t properly wiped.
📌 Note on HDDs vs. SSDs
- HDDs (Hard Disk Drives): Tools like DBAN can securely overwrite data since sectors are fixed and accessible.
- SSDs (Solid-State Drives): DBAN is not effective because of wear-leveling. Use firmware-level ATA Secure Erase, specialized SSD erasure tools like Blancco SSD for guaranteed compliance with NIST 800-88.
Step 4: Remove Non-Recyclable or Hazardous Components
The fourth step in your computer recycling checklist is removing components that can’t travel in the standard e-waste stream. Doing this in advance reduces fire risks, prevents regulatory violations, and makes your recycler’s job smoother.
Ink and Toner Cartridges
Printer cartridges may look harmless, but they often contain residual toner powder, which can cause respiratory irritation if mishandled.
Cartridges are not processed with e-waste in California; they belong in manufacturer take-back programs (HP Planet Partners, Canon Recycling, etc.) or office supply store drop-offs.
Collect and centralize ink cartridges from all departments to avoid leaks or contamination.
Monitors
Old office monitors need special attention.
- CRT monitors (rare but still in storage closets) contain 4–8 pounds of leaded glass. These have been illegal to landfill in California since 2006.
- LCD monitors manufactured before 2010 often used mercury CCFL backlights, making them hazardous waste items.
Labeling monitors by type — CRT, LCD, or LED — before handing them off helps recyclers process them correctly.
Printers and Peripherals
Office printers combine circuit boards, plastics, and toner compartments. Cartridges should always be removed before disposal. Wireless mice, keyboards, and external drives may contain small lithium batteries — those devices must be flagged separately.
Networking devices like switches and routers may have internal capacitors or batteries that require careful handling.
By proactively removing and labeling these components, IT managers minimize hazards, stay compliant with California DTSC rules, and make the recycler’s process far more efficient.
💡Pro Tip: Create a separate “hazard bin” in your IT storage area for toner and CRT monitors. Use fire-resistant containers and clearly label each bin. This prevents last-minute scrambling during pickup and demonstrates compliance if regulators ever inspect your process.
⚠️ Note: GreenCitizen cannot currently accept any loose batteries not installed in electronics due to hazards associated with handling and storage.
Step 5: Physically Prepare Computers for Pickup or Drop-Off
With your inventory complete and hazardous parts removed, the next step is making sure your computers are ready for transport. The goal here is safety, efficiency, and accountability.
Start by organizing devices by type. Keep desktops, laptops, and monitors in separate groups, and attach asset tags or labels that match your inventory log.
Sensitive units flagged for secure destruction should be boxed and clearly marked to avoid confusion later.
When it comes to packing, think in terms of both protection and ease of handling. Pallets are best for bulk pickups — layer devices carefully with cardboard sheets in between so nothing shifts.
Smaller components like hard drives or circuit boards should go in anti-static bags, while LCD monitors and other fragile items deserve bubble wrap or foam padding. Resist the temptation to overload cartons; keeping boxes under 50 pounds protects both your team and the recycling crew.
Accessibility matters too. Recyclers expect equipment staged at ground level or in areas reachable by a freight elevator. Clear pathways and loading docks ahead of time so crews can move quickly and safely. If your office is large or in a busy downtown location, scheduling pickups outside core business hours can minimize disruption.
Taking the time to prepare equipment properly not only prevents accidents and damage but also demonstrates a level of professionalism that strengthens your recycling partnership.
💡Packing Pitfalls to Avoid
- Don’t shrink-wrap devices directly — trapped heat and static can damage components.
- Don’t leave devices loose in bins; they can shift, break, or cause injuries.
- Don’t stack monitors face-to-face; always separate screens with padding.
Step 6: Choose the Right Recycling Partner
Even the most detailed computer recycling checklist can collapse if your recycling partner isn’t qualified. The Bay Area is full of options — from uncertified haulers to manufacturer take-back programs — but not all provide the accountability businesses need.
Start with certifications. Recyclers that follow R2 (Responsible Recycling) or e-Stewards are independently audited for environmental, worker safety, and data security compliance. Uncertified haulers, on the other hand, may cut corners by exporting e-waste overseas, dumping devices in landfills, or skipping secure data destruction altogether.
Manufacturer take-back programs (Dell, HP, Apple) look convenient, but they rarely offer local pickup, chain-of-custody tracking, or itemized reporting. For Bay Area companies facing compliance audits, that’s a major gap.
By contrast, a dedicated local recycler can provide:
- Pickup services tailored to your office schedule.
- Certified downstream processing partners.
- Documentation that stands up in front of regulators and ESG auditors.
The most critical factor is chain-of-custody reporting. IT managers need proof that every device — from executive laptops to old servers — was logged, tracked, and recycled responsibly. Without this, your organization is exposed to data breaches, regulatory fines, and reputational damage. A strong recycler delivers itemized certificates of recycling and data destruction that match your internal asset logs.
Choosing the right partner isn’t just about disposal — it’s about securing your data, demonstrating compliance, and protecting your company’s reputation.
⚠️ Pro Tip: Always request itemized reports tied to your asset inventory. This guarantees full chain-of-custody accountability and provides airtight documentation for compliance audits, ESG reporting, and board-level reviews.
Step 7: Documentation and Reporting
The final step in your computer recycling checklist is ensuring airtight documentation. Once equipment leaves your office, paperwork becomes your last line of defense. For Bay Area IT managers, proper reporting can mean the difference between a smooth audit and a costly compliance failure.
At minimum, expect two essential documents from your recycler:
- Certificate of Recycling (CoR): Proof that devices were processed responsibly and not landfilled or illegally exported.
- Certificate of Data Destruction (CoD): Verification that every hard drive, SSD, or storage device was wiped or destroyed following NIST 800-88 or DoD 5220.22-M standards.
The best recyclers go further by issuing itemized reports that map directly to your inventory log. These include make, model, and serial numbers, along with the method of destruction or recycling for each device. This creates airtight audit trails for IT asset management, compliance reviews, and board-level reporting.
For CSR-driven companies, documentation adds even more value. Detailed reports can quantify how many pounds of e-waste were diverted from landfills or how much raw material was recovered — data that supports sustainability goals, annual reports, and stakeholder communication.
When handled correctly, documentation transforms computer recycling from a liability into a compliance asset — protecting your company legally, operationally, and reputationally.
💡 Pro Tip: Store all CoRs, CoDs, and itemized reports in the same system as your IT asset inventory. This single source of truth makes audits painless and demonstrates end-to-end accountability to regulators and executives.
Computer Recycling Made Simple with GreenCitizen
Every step in this computer recycling checklist — from inventory logging to certified data destruction — is built into GreenCitizen’s recycling process. For nearly two decades, we’ve helped more than 70,000 Bay Area businesses recycle responsibly, protect sensitive data, and meet ESG goals.
Unlike OEM take-back programs or uncertified haulers, GreenCitizen offers a complete, transparent solution:
- Chain-of-Custody Tracking → Our proprietary GreenCitizen Total Accountability Management System (GTAMS) logs and tracks every item. IT managers receive itemized Certificates of Recycling and Certificates of Data Destruction that meet NIST 800-88 and DoD 5220.22-M standards.
- Secure Data Destruction → Both software erasure and physical drive destruction are available, each backed by compliance-grade documentation.
- Certified Recycling Partners → We only work with R2 and e-Stewards recyclers, ensuring devices are processed domestically and never dumped overseas.
- Convenient Pickup Service → We handle the entire pickup process so your team doesn’t have to. From scheduling to safe loading and transport, our trained staff eliminate the headache of moving heavy equipment. Available across the San Francisco Bay Area — our business pickup service makes computer recycling simple, compliant, and hassle-free.
- Proven Sustainability Impact → Since 2005, we’ve recycled 32 million pounds of e-waste, giving businesses measurable ESG reporting data.

With GreenCitizen, IT managers don’t just check a box — they gain a partner who secures data, satisfies regulators, and strengthens corporate sustainability commitments.
Final Thought: A Computer Recycling Checklist Protects More Than Devices
Following a detailed computer recycling checklist turns IT asset disposal from a compliance risk into a business advantage. By inventorying equipment, backing up data, erasing drives, and choosing a certified partner, IT managers create airtight audit trails, protect sensitive information, and meet ESG commitments.
For Bay Area companies, GreenCitizen makes this process even simpler with secure business pickups, certified downstream partners, and full chain-of-custody reporting through GTAMS.
With the right checklist — and the right partner — recycling old computers becomes a secure, sustainable, and stress-free part of your IT lifecycle.