I’ll never forget the day I accidentally spilled beet juice on my white shirt. Instead of a stain, I found fascination. That mishap led me down the rabbit hole of natural dyeing, a process that not only breathes new life into fabrics but does so in an eco-friendly way.
This guide is about transforming your kitchen waste—think onion skins, avocado pits, and old tea bags—into a palette of natural dyes. We’ll explore the benefits, dive into the how-tos, and even uncover a bit of the science behind it. Join me as we turn scraps into sustainable art.
Choosing the Right Fabric for Natural Dyeing
Types of Fabrics Best Suited for Natural Dyes
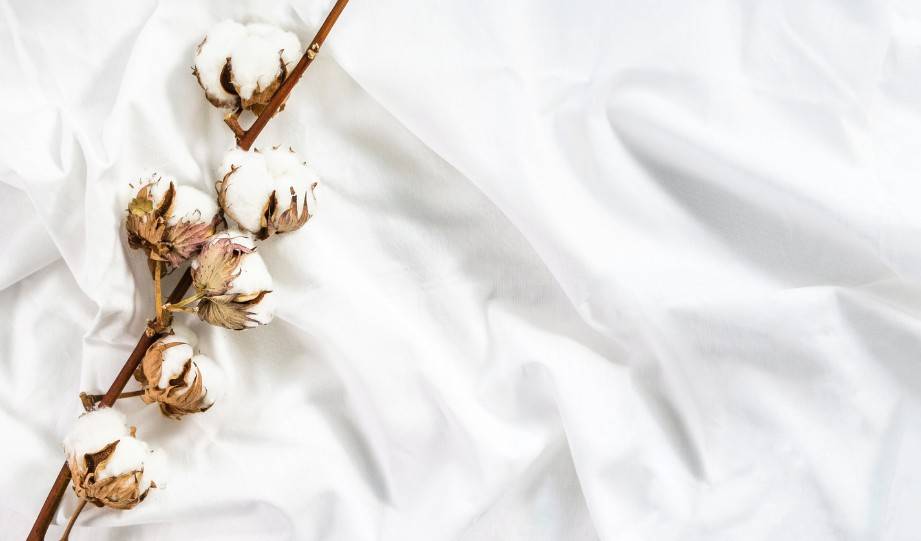
When I first delved into the world of natural dyeing, I quickly learned that not all fabrics are created equal. The key to vibrant, lasting colors lies in choosing the right material.
Natural fibers like cotton, linen, and silk hold natural dyes much better than their synthetic counterparts. Why?
It’s all about the fibers’ ability to bond with the dyes, a crucial step for the dye to “stick” and stay.
Cotton, for instance, is incredibly versatile and readily available, making it a favorite among beginners and seasoned dyers alike. Its absorbent nature ensures that it takes up dye well, resulting in deep, rich colors.
Linen, made from the flax plant, offers a similar affinity for natural dyes, with the added bonus of durability and strength.
Silk, though a bit more luxurious, is a marvel with natural dyes. Its protein fibers interact uniquely with different mordants and dyes, producing a wide range of hues and effects that are truly a sight to behold.
Choosing a natural fiber as your canvas is the first step in a successful natural dyeing project. It’s not just about the fabric’s ability to hold dye; it’s also a commitment to sustainability and eco-friendly practices.
Natural fibers are biodegradable and have a much lower environmental impact than synthetic ones, aligning perfectly with the ethos of sustainable living and eco-conscious lifestyle choices.
So, whether you’re a novice or a natural dye enthusiast, starting with the right fabric is essential for vibrant, beautiful, and lasting colors.
Preparing Your Fabric for Dyeing
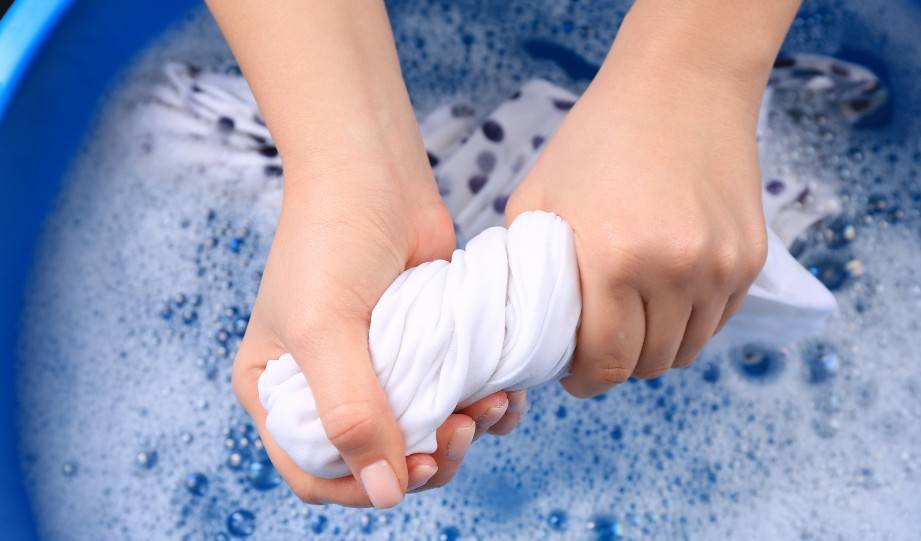
Before diving into the world of natural dyes, preparing your fabric is a critical first step. This preparation ensures your fabric fully absorbs the beautiful colors from your kitchen waste dyes. Here’s how to get your fabric ready:
1. Wash Your Fabric
Start by washing your fabric to remove any impurities or oils that might block the dye. Use a mild detergent and warm water for this step. It’s about starting with a clean slate to ensure even dye coverage.
2. Soak in a Mordant Solution
Next comes mordanting, a step that might sound complex but is simply about treating the fabric to ensure the dye sticks. For natural fibers, alum is a commonly used mordant, friendly to both the environment and your health. Dissolve a small amount of alum powder in hot water—about 15 grams per 100 grams of fabric—and immerse your fabric in this solution. Let it simmer for an hour, then rinse it in cool water.
3. Rinse and Dry
After mordanting, rinse your fabric under cool water to remove any excess mordant. Then, allow your fabric to dry completely before dyeing. This step is crucial for achieving an even color distribution during the dyeing process.
The Best Kitchen Scraps for Colorful Dyes
Top Foods for a Rainbow of Dyes
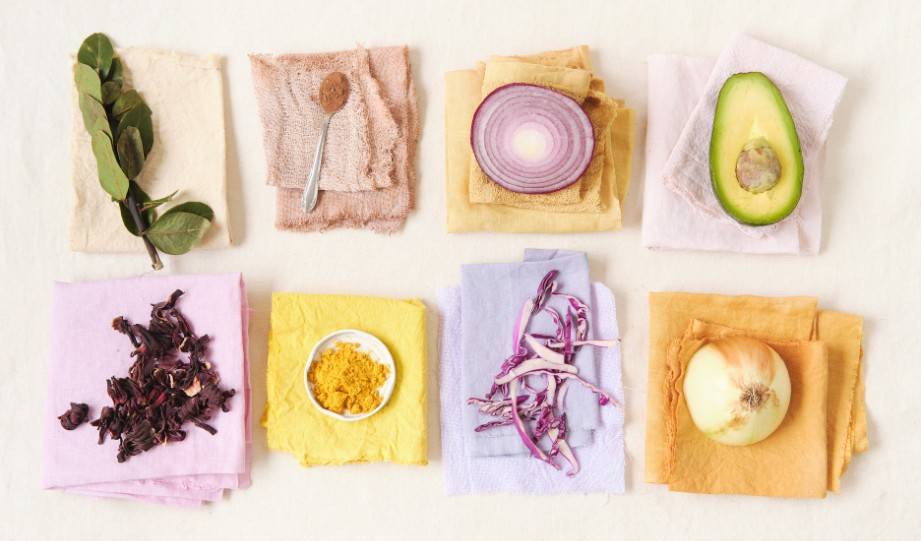
Embarking on the journey of natural dyeing introduces you to a world where kitchen waste becomes a treasure trove of color. Surprisingly, many items you might consider discarding can infuse fabrics with rich, vibrant hues. Here are some top foods to transform into a rainbow of dyes:
Onion Skins: Gather the papery outer skins of yellow onions to produce a range of colors from soft yellows to deep golds. The more skins you use, the richer the color you’ll achieve.
Avocado Pits: Avocado pits are a hidden gem in natural dyeing, yielding beautiful pink and peach shades. The number of pits and the fabric’s mordant treatment can alter the hue intensity.
Coffee Grounds: Used coffee grounds offer a straightforward path to achieving earthy browns. They’re especially good for a subtle, antique look on natural fibers.
Red Cabbage: This common kitchen leftover can create a stunning spectrum of blues and purples. The pH of the dye bath can shift the color towards blue or more lavender tones.
Beetroot Scraps: For those aiming for pinks and reds, beetroot scraps are a fantastic choice. The resulting color can range from soft pink to a more saturated red, depending on the fabric and mordant used.
Turmeric: For a vibrant yellow, turmeric is unmatched. Even a small amount can dye fabric a bright, sunny yellow, making it perfect for standout pieces.
Collecting and Storing Kitchen Waste for Dyeing
Here are some tips to make the most of your kitchen scraps for dyeing:
Designate a Storage Bin
Keep a container in your freezer specifically for dyeing scraps. This prevents spoilage and keeps your kitchen tidy.
Dry Some Scraps
Onion skins and avocado pits can be dried and stored in a cool, dark place. This method is perfect for items that might not freeze well.
Label Your Collections
Label containers with the type of scrap and the date collected. It helps in planning your dye projects and using older scraps first.
Essential Tools and Ingredients for Natural Dyeing
Overview of Necessary Equipment

For natural dyeing, having the right tools and ingredients on hand is essential to transform kitchen waste into stunning, eco-friendly colors. Here’s a straightforward list of what you’ll need:
Pots: Stainless steel or enamel pots are best for dyeing, as they don’t react with the natural dyes. You’ll want a couple of different sizes, depending on the amount of fabric or items you’re dyeing.
Strainers and Cheesecloth: A fine mesh strainer and cheesecloth are crucial for filtering out bits of food scrap from your dye bath, ensuring a smooth dye on your fabric.
Gloves: To avoid staining your hands, use gloves. Rubber or disposable gloves will protect your skin from both the dye and any mordants used.
Measuring Cups and Spoons: Precision matters in dyeing for consistent results, so have a set dedicated for your dyeing projects.
Wooden Spoons or Stirrers: Wooden tools are preferred for stirring your dye bath because they’re less reactive than metal.
pH Test Strips: These can help you adjust the dye bath to achieve different shades, especially with dyes like red cabbage, which change color with pH.
Mordants: Mordants like alum or iron fix the dye to the fabric and can alter the hue of your dye. They’re a key ingredient for long-lasting color.
Key Ingredients Besides Kitchen Waste
Beyond kitchen waste, achieving vibrant and lasting colors with natural dyes requires a couple more key ingredients: mordants and fixatives.
Mordants are substances that help the dye bond with the fabric, ensuring the color sticks around wash after wash. Alum is the most commonly used mordant due to its effectiveness and low environmental impact. It’s suitable for a wide range of natural fibers and dyes, providing a clear, bright color.
Fixatives (or after-baths) improve color fastness, preventing your dye from fading too quickly. Common natural fixatives include salt for berry dyes and vinegar for plant-based dyes. These substances help lock the color into the fabric, extending the life of your dyed items.
Incorporating mordants and fixatives into your dyeing process is crucial for eco-friendly crafts and sustainable fashion projects, ensuring your creations remain vibrant and beautiful over time.
DIY Natural Dye Methods
Quick-Boil Method
The quick-boil dye method is a straightforward way to dive into the world of natural dyeing with kitchen waste. Here’s a step-by-step guide to creating vibrant dyes in a short amount of time:
Step 1: Gather Your Materials
Collect your kitchen waste. Onion skins, avocado pits, and used coffee grounds are great starters. You’ll need a substantial amount, as the more you have, the more intense the color will be.
Step 2: Prepare Your Fabric
Ensure your fabric is clean and has been mordanted correctly. This step is crucial for the dye to adhere properly.
Step 3: Create the Dye Bath
Fill a large pot with water and add your kitchen waste. The general rule is to have enough water to cover the fabric you intend to dye but also enough kitchen waste to ensure a rich color.
Step 4: Boil and Simmer
Bring the mixture to a boil, then lower the heat and let it simmer for about an hour. This process extracts the dye from your kitchen waste.
Step 5: Strain the Dye Bath
Once the color looks rich enough, remove the pot from the heat. Use a strainer and cheesecloth to filter out the solid waste, leaving behind only the liquid dye.
Step 6: Dye Your Fabric
Wet your fabric in warm water, then add it to the dye bath. Return the pot to a simmer and let the fabric soak. The longer it soaks, the deeper the color will be. For a quick dye, 30 minutes to an hour is sufficient, but feel free to experiment with timing.
Step 7: Rinse and Dry
After dyeing, remove the fabric from the dye bath and rinse it under cool water until the water runs clear. Then, hang the fabric to dry away from direct sunlight to avoid fading.
Tie-Dye Method
Tie-dyeing with food scraps offers a unique way to breathe new life into fabrics, creating patterns and designs that are not only beautiful but also sustainable. Here’s a straightforward guide to get you started:
Step 1: Prepare Your Fabric
Just like any dyeing process, start by washing your fabric and treating it with a mordant. This ensures the dye from your food scraps adheres well to the fabric.
Step 2: Choose Your Scraps
For tie-dye effects, scraps that produce vibrant colors are ideal. Think turmeric for yellows, beetroot for pinks, and red cabbage for blues. Mix and match to create a palette of your choice.
Step 3: Create Your Dye Baths
Simmer your chosen scraps in separate pots of water to extract the colors. The longer you simmer, the more intense the colors. Strain the liquid to remove solid pieces.
Step 4: Tie Your Fabric
Use rubber bands or string to tie your fabric in patterns. The classic spiral, bullseye, and stripes are great for beginners. The areas tied off will resist the dye, creating patterns.
Step 5: Dye Your Fabric
Dip different sections of your tied fabric into the dye baths. For more defined colors, dip segments into one color at a time, allowing them to dry slightly between colors. For a blended effect, let the colors overlap slightly.
Step 6: Set the Dye
Once you’ve achieved your desired look, rinse the fabric in cold water until the water runs clear. For extra color fastness, you can use a fixative bath of either vinegar or salt water, depending on your dye material.
Step 7: Reveal Your Design
Remove the ties and unveil your unique tie-dye creation. Wash it alone for the first few washes to remove any excess dye.
Slow Solar Method
Slow solar dyeing is a fascinating, eco-friendly method that harnesses the sun’s energy to create natural dyes from kitchen waste. This process not only saves energy but also produces uniquely vibrant colors, all while being gentle on the fabric. Here’s how you can get started:
Step 1: Prepare Your Dye Stuff
Choose your kitchen scraps—such as onion skins for yellows, avocado pits for pinks, or spinach leaves for greens. Chop or crush them to increase the surface area for better color extraction.
Step 2: Jar It Up
Place your fabric and prepared scraps into a large, clear glass jar. Glass allows sunlight to penetrate the mixture, facilitating the dyeing process. For every part of scraps, add two parts of water to ensure the fabric is fully submerged.
Step 3: Add a Mordant
To fix the dye to the fabric, add a natural mordant to your jar. Alum is a popular choice for its non-toxic and effective properties. Stir to ensure it’s well-distributed.
Step 4: Seal and Set
Close the jar tightly to prevent evaporation and place it in a sunny spot. The greenhouse effect inside the jar will heat the mixture, allowing the natural dyes to infuse into the fabric.
Step 5: Patience Pays Off
Leave your jar in the sun for at least two weeks, shaking it gently every few days to stir the mixture. The longer you leave it, the deeper the color will be.
Step 6: Rinse and Dry
Once you’re happy with the color, remove the fabric from the jar, rinse it in cold water until the water runs clear, and hang it to dry away from direct sunlight to prevent fading.
The Benefits of Using Natural Dyes

Environmental Impact
Synthetic dyes, prevalent in the textile industry, are notorious for their toxic waste and high water consumption. In contrast, natural dyes from kitchen waste utilize materials that would otherwise contribute to landfill problems.
This approach not only recycles organic waste but also avoids the introduction of harmful chemicals into our waterways. The process of extracting color from avocado pits, onion skins, and coffee grounds, among others, requires significantly less water than its synthetic counterparts and completely eliminates the need for petroleum-based chemicals.
Moreover, the act of natural dyeing encourages a slower, more mindful approach to fashion and crafts. It’s part of a broader sustainable living philosophy that values quality over quantity and environmental health over convenience.
By integrating natural dyes into our lives, we’re not just making a stylistic choice; we’re participating in a deeper movement towards eco-conscious lifestyle choices that prioritize the health of our planet.
Health and Safety
Switching to natural dyes is not only an eco-friendly choice but also a healthier one for both ourselves and our environment.
Unlike synthetic dyes, which often contain harmful chemicals like azo compounds known to release carcinogenic amines, natural dyes offer a safe alternative.
By using ingredients from your kitchen waste, such as turmeric, beetroot, and onion skins, you’re applying substances to your fabrics that are food-grade and non-toxic.
The process of making and using natural dyes inherently reduces exposure to toxic chemicals, making it a safer option for those involved in the dyeing process, from the dyers to the end-users. This is especially important in households with children or pets, where safety and non-toxicity are paramount.
The Fascinating Science Behind Natural Dyes
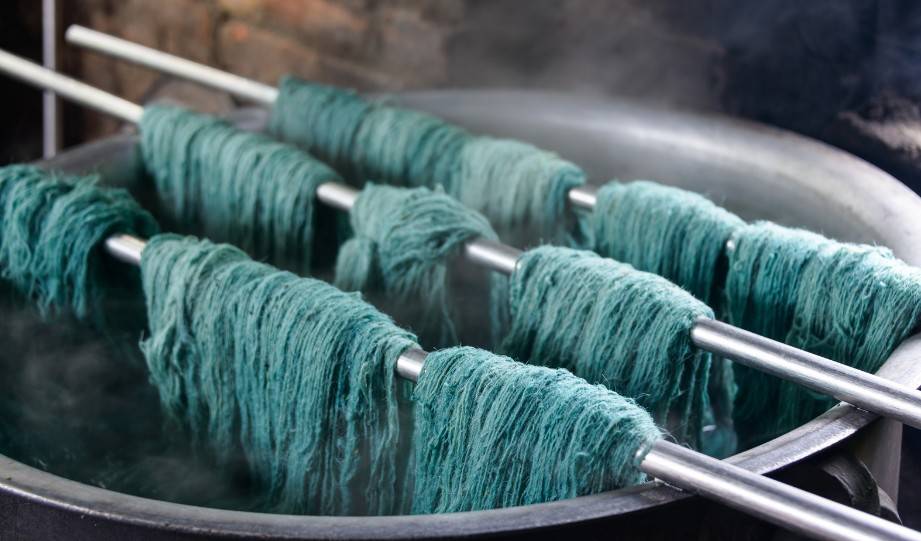
The magic of natural dyes lies not just in their beauty but in the fascinating science that makes them work. At the heart of natural dyeing is the chemistry of color absorption and bonding, a process fundamentally different from that of synthetic dyes.
Natural dyes adhere to fabrics through a chemical bond formed between the dye molecules and the fiber molecules. This bonding is often facilitated by mordants, such as alum or iron, which serve as a bridge linking the dye and fiber.
Mordants not only help fix the dye to the fabric but can also significantly affect the final color. For example, alum tends to brighten colors, while iron can darken and mute them.
The color in natural dyes comes from various organic compounds found in plants and food waste. For instance, the vibrant yellow of turmeric comes from curcumin, while the deep red of beetroot is due to betalain.
Each of these compounds has its unique molecular structure, which determines how it absorbs and reflects light, thus giving us a spectrum of colors.
pH levels also play a crucial role in natural dyeing. The acidity or alkalinity of the dye bath can shift the colors of some dyes dramatically. Red cabbage, for instance, can turn from pink in a slightly acidic solution to a beautiful blue in an alkaline environment, thanks to changes in the molecular structure of its pigments.
Conclusion
Turning kitchen waste into natural dyes bridges the gap between sustainability and creativity. This practice not only reduces environmental impact but also enriches our lives with unique, vibrant textiles. By choosing natural dyes, we embrace a healthier, more eco-conscious lifestyle.
I encourage you to explore the art of natural dyeing. Start with the scraps you have, and experiment with different techniques.
Then, share your creations and insights with others. Together, let’s spread the word about this sustainable craft. Your journey into natural dyeing could inspire a broader change towards more mindful and environmentally friendly living.


