More and more people are realizing how easy it is to grow fresh, organic, and delicious food at home and have fun for the whole family. But most people shy away from the idea because they think they need lots of space and time to do this.
And while a large garden with a sectioned-off plot for growing your own food is ideal, you’ll be surprised how much food you can produce in container gardens.
Let me show you how to approach it.
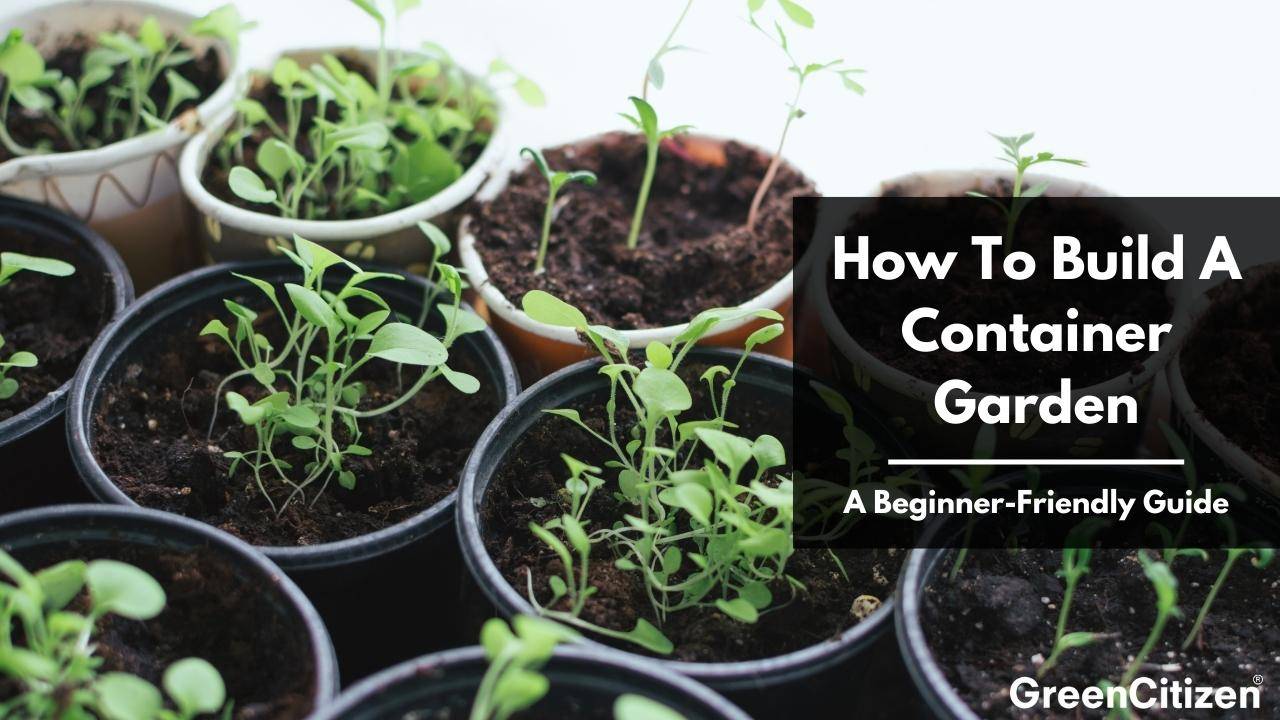
What Is A Container Garden?

A container garden is an approach to planting fruit, vegetables, herbs, and flowers in containers like pots and baskets. It’s ideal for growing most plants in urban areas or where there simply isn’t a practical way to set plants directly in the ground.
Growing vegetables, fruit, and herbs at home has become more than an isolated hobby for people with green thumbs.
The great thing about container plants is that they are just as easy to grow and maintain as if you had a patch of ground available for food.
With the right combination of containers, potting mix, seeds, and fertilizer, you can have more than enough food for your family in just a few months.
And you don’t need years of experience to get started.
Let’s start with the basics.
Choosing The CORRECT Place For Your Container Garden
Before you start picking out your container plants, you have to pick the right place for growing plants. This involves looking at three things.
1 – Evaluate Sunshine
The most important thing that you can’t rectify if you’ve picked the wrong place for your plant containers is how much sunshine the area gets.
Vegetables and fruit need a lot of sunshine, while many herbs will do fine in partial shade. The thing is, you can always create artificial shade if some of your favorite plants don’t do so well in full sunshine all day.
So, take a look at your outdoor area in the morning, at lunchtime, and late afternoon to see where the most sun is throughout the day.
Ideally, that will be a prime candidate for your plants in containers.
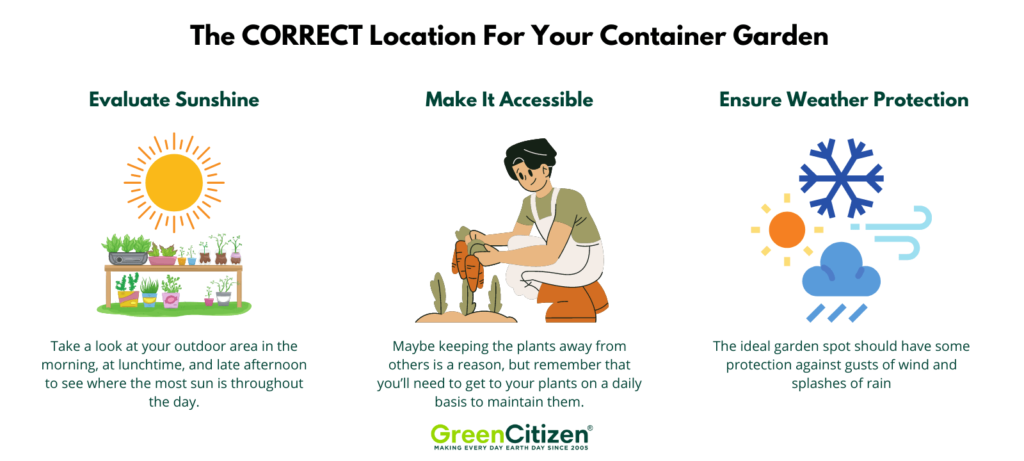
2 – Make It Accessible
The next thing you have to think of is how easily you can access the area. I’ve seen people set up their containers on rooftop areas where it’s not easy to get to them.
Maybe keeping the plants away from others is a reason, but remember that you’ll need to get to your plants on a daily basis to maintain them.
From watering to harvesting and pest control, you want to place containers somewhere you can easily get to when you have a few minutes to spare.
3 – Ensure Some Weather Protection
One issue you often have with picking the sunniest spots is that those can often also be the most exposed areas to place plants.
That means that your plants can become exposed to a lot of wind. If it gets very windy, it can damage the leaves on plants, especially when they are still very young. But constant wind exposure also dries out the plants a lot quicker.
As a result, you’d have to water them a lot more frequently.
How To Select The Right Container
The first thing people think of for containers is window boxes. But I suggest that you look at a few different options so that you can enjoy container gardening to its full potential.
Here’s what I suggest you focus on in your decision-making.
1 – Size
Don’t just assume that larger containers are what you need to go for. Yes, you’ll plant more in them, but if you ever need to move them around, you’re going to have some difficulty.
Instead, choose a few different size containers and make the most of them.
For trailing plants, you’ll want to have tall pots or baskets to keep them off the ground. And for things like potatoes, carrots, and other root vegetables, find containers that allow you to plant your veggies in rows for easier maintenance and harvesting.
Maybe start with a few smaller pots to get started and see how easy it is to grow your own veggies.
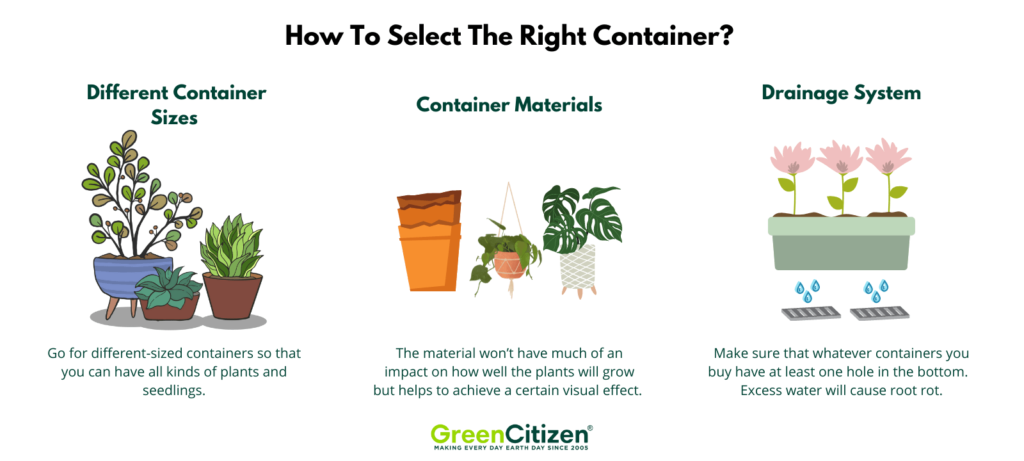
2 – Container Materials
The material won’t have much of an impact on how well the plants will grow, but it might be important if you also want to achieve a certain visual effect.
Here are just a few types of materials that you can find and a reason why I like them.
- Terra Cotta Pots: these clay pots are great looking and easy to move around
- Metal Containers: small galvanized tubs can be very effective looking, but they can eventually start to rust.
- Hanging Baskets: great for taking more advantage of limited space without crowding it out.
- Window Boxes: ideal window sills and to plant rows of root vegetables, but they offer limited space.
- Concrete containers: these will last a lifetime, but they are very heavy and not easy to move around.
There really isn’t one right container for everyone, so make a choice on what seems like a good option for you.
3 – Drainage
This is one of the most important aspects of potted plants. In the ground, excess water will drain away, and you won’t end up with a problem of overwatering plants.
But when plants are in pots, and you get particularly heavy rain, then the soil can become oversaturated. And that can lead to root rot and the plants dying.
Make sure that whatever containers you buy have at least one hole in the bottom.
If you have very large containers like concrete planters, then you might need to add a drainage layer at the bottom so that there is somewhere for the water to go.

Read More:
Soil/Potting Mix For Container Gardens
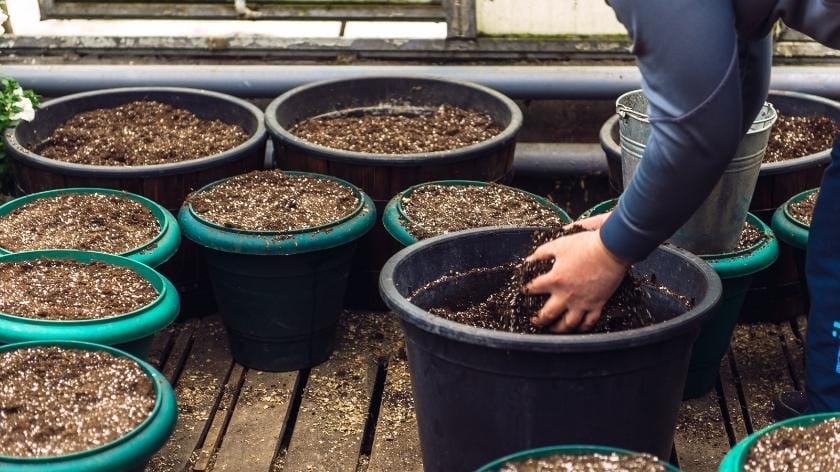
Now we’re getting into the messy part, where I would tell all newbies and beginners not to shy away from getting their hands dirty.
Get used to handling container garden soil as it will help you learn to feel for moisture and even how coarse or fine the compost is.
Here’s what you’ll need.
1 – Potting Soil
Don’t head to your garden and start digging up some soil. This is likely going to be very heavy and not well-draining. You’ll notice that when you dig up the garden, the soil is very compacted, and that’s not ideal for your containers.
Instead, buy some potting soil from your local garden center. This is typically a soil and compost mix that is slightly coarse, fast-draining, and lightweight.
You’ll notice that once you pick up a fistful of it.
2 – Potting Mix
You’ll sometimes see garden centers sell potting mix for container gardening. It’s very similar to regular potting soil but often has some added fertilizer like nitrogen.
It’ll cost more, and personally, I don’t think it’s worth it. You’re better off just getting standard soil and then adding the right type and amount of fertilizer at a later time.
3 – pH Of Soil
Most of the time, potting soil will have a neutral pH. And that’s generally a good way to get started as it won’t cause problems for most plant combinations you’re planning.
But there are plants that have very specific requirements. For example, if you want to grow blueberries, you’ll need quite acidic soil. Now, you can buy an acidic potting soil, or else just buy some iron sulfate to mix into the soil.
Similarly, if you have plants with alkaline requirements, then you’d add some powdered lime into the mix.
Should You Go For Seeds or Seedlings?
OK, so you have the first two parts of container gardening sorted. There’s a large pot and some potting soil ready to go, and now it’s time to decide how to start planting.
Let me explain.
Why Choose Seeds?
First of all, it’s the cheapest way to start container plants, and it’s also the purest form of gardening. You can buy dozens of seeds for the price of a single seedling in a garden center.
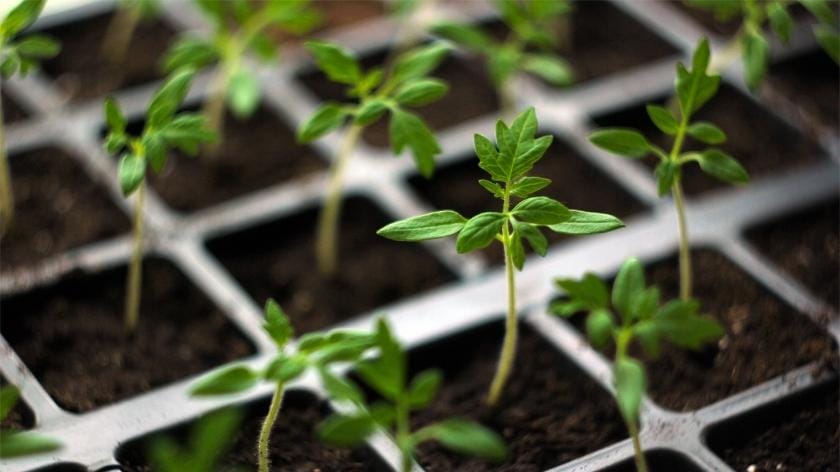
And it really doesn’t take a huge amount of skill to get seeds to germinate. In the vast majority of cases, you just need a seed tray with potting soil. You then place the seeds a few inches apart and usually about one inch into the soil.
For veggies like radishes, you’ll see the first leaves pop up within a couple of days.
The downside is that it can take longer, and if you’re getting started later in the year, then you might struggle to get a good harvest.
Why Choose Seedlings?
Not all seeds will turn into seedlings, and that can be frustrating when you’re a beginner.
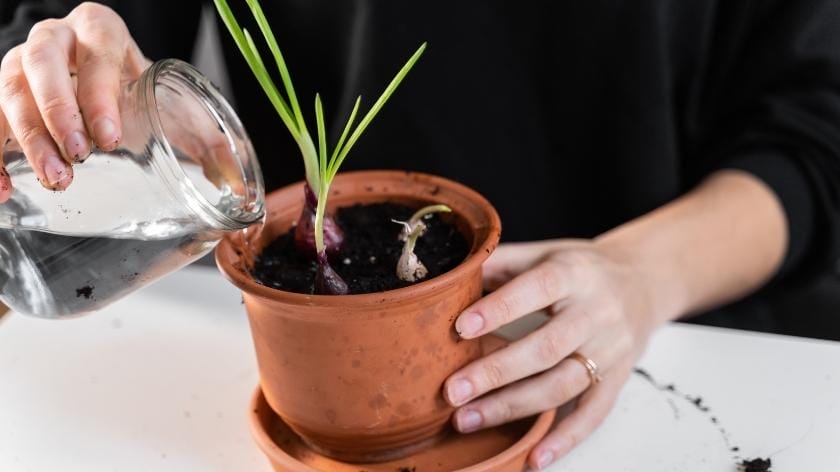
With seedlings, you can buy small plants that have grown enough to go into a window box or clay pot. Simply add more soil and make sure that the seedlings continue to get full sun and lots of water. Also, avoid planting them too close to the container’s edge as you want the root ball to spread out evenly.
What Plants Are Good For Container Gardening?
OK, so you’ve made a decision on seeds or seedlings, you have some ceramic containers filled with soil, and now it’s time to choose some plants.
Here are some examples to get your container gardening started.
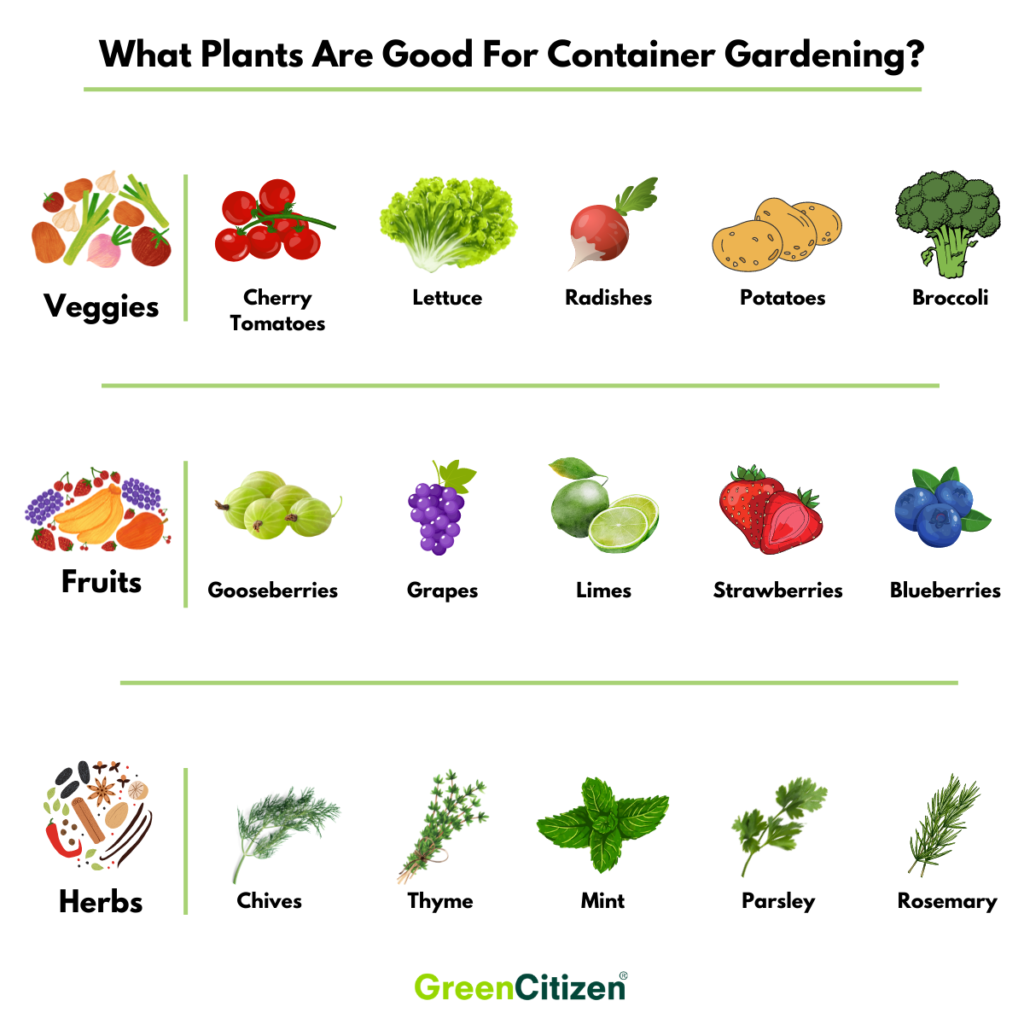
Vegetable Plants
I would recommend starting off with fast-growing and maturing veggies that will do well in small and large containers. The other thing to keep in mind is that smaller vegetables will do a lot better even in a large window box.
It’s possible to grow large pole beans, but I wouldn’t recommend starting with these as a beginner.
Keep those for when you’ve gained some experience.
So, look for leafy greens, root vegetables, and some color.
Here is what I planted the first time:
- Cherry tomatoes
- Lettuce
- Radishes
- Potatoes
- Broccoli
- Carrots
- Peppers
Fruit
When it comes to fruit, it’s a bit more difficult, as many will require large containers. You want to choose plants that won’t grow too large and that don’t require unique temperatures and watering.
Here are some that I have successfully grown:
- Miniature lime tree
- Raspberries
- Blueberries
- Gooseberries
- Grapes
- Strawberries
Keep in mind that many plants will keep growing larger, so you may need to trim them back to keep them to a certain size that suits your environment.
What you need to keep in mind with fruit and certain other plants is that when they start developing the fruit, they will require a lot of water.
I’ll cover watering in the next section, along with a tip to make the whole process foolproof.
Herbs
Herbs are ideal as container plants. You can fit five or six different herbs into a relatively small container. They generally grow fast and remain small plants. I have a few unglazed pots that I can move into full sun as required by the type of herb.
Here are the ones I have found easiest to grow:
- Chives
- Thyme
- Mint
- Parsley
- Rosemary
Head to your local garden center and ask about herb seeds and seedlings in stock, and don’t shy away from trying out new things.
Read More:
Understanding Watering and Fertilizing Habits
In some ways, container gardening requires some more careful planning when it comes to fertilizing and watering plants. It takes a bit of preparation and then coming up with a regular schedule.
And I have some tips for this in the next section.
Drainage Holes
All your pots need drainage holes in the bottom. The reason for this is that if the plants are exposed to heavy rain, then the soil can get waterlogged, and that can cause root rot.
Most garden pots that you find at a garden center will have a drainage hole in the bottom, but it’s always a good idea to check first.
Also, check how large it is. I had a large terra cotta pot with a very small hole in the bottom, and my plants didn’t do well in it.
If you have large pots like that, then consider drilling a few extra holes for added drainage.
Manual Watering
OK, so you know about drainage; now it’s time to get into a routine for watering. Depending on how many containers you have and how easily accessible they are with water, I would suggest buying two or more watering cans.
You can pick them up cheap at a garden center, and having two can save you a few trips if the outside water faucet isn’t close by.
I would advise planning to water your containers daily with not too much water. Having a steady supply of water will help with growth and avoid the soil getting too saturated and compacted.
A simple way to check if the soil is moist enough is to use a popsicle stick and push it two inches into the soil. If it comes back out completely dry, then you need to add water.
Drip Irrigation
Once you get your first few containers set up, I would suggest investing in a pump drip irrigation system. You can pick these up for less than $100, and they have a few major advantages.
First of all, you can set a timer and have the peace of mind that your plants will always have enough water. Even if you head away on vacation, your plants won’t be shriveled up by the time you get back.
Secondly, you can adjust the drippers to specific watering needs and whether a plant is in the sun or shade. You can have one dripper for one plant set to an extremely slow drip while all others have a faster rate.
The third advantage is that you can save a lot of water usage. The drippers will deliver water exactly where it is needed at the roots. You avoid saturating the leaves, which can damage some plants and just means that water evaporated.
Fertilizing
To get started, I would suggest buying a liquid fertilizer that you can mix with water. That gives you reasonable control over how much you apply and when.
Now, some plants like tomatoes will do much better when you add fertilizer every two to three weeks. While others, like berries, do better with a slow-release fertilizer.
A slow-release fertilizer usually comes in granules, and you mix it into the soil at the base of the plant. A good quality one will keep feeding the plant for three or more months.
What you want to do is write down the fertilizer needs of every plant you have. Keep note of the type and timing, and then create a schedule.
More on that shortly.
I generally use fish emulsion and liquid seaweed as it tends to be the most concentrated. But you can pick different types available in a garden center.
Do The Plants Need Additional Support?
While I recommend starting with container gardening by planting smaller plants, you might have some like raspberries, peas, and beans that need some support. What I mean is physical support to make sure that they don’t fall down under their own weight.
Not all the plants will require such support. For example, blueberry bushes are strong enough to support themselves. But beans and raspberry plants will quickly end up on the ground as they grow taller.
To solve this, invest in a few trellises in your garden center. You can then tie the plants to this frame, and they will have all the support they need.
My Personal Tips For Beginner-Level Gardeners
When I first started container gardening, I didn’t take a planned approach and ended up making a ton of mistakes, which meant I didn’t have good harvests for two years.
With a bit of experience now, I’ve been able to grow vegetables consistently. And here are a few tips that will make things so much easier for you.
1 – Plan Your Seeding
The first one of my container garden ideas is to plan out how many seeds you plant. When I first started to grow my own fruiting vegetables, I bought about ten different seed packs and loads of seed trays and got started.
I had a huge harvest of food all in one go and ended up giving and throwing away most of it.
So, spread out when you plant seeds so that you can harvest about 2-3 weeks apart.
2 – Repot Seedlings At The Right Time
You also need to make sure that you wait long enough before you repot your seedlings. Don’t do this when the first small leaves pop up, as the seedling is very vulnerable at that time.
Wait until there are at least two or three sets of leaves and the seedling is about two inches tall.
Then replant them and make sure the plant stems are far enough apart. This will depend on the grown size of the plant, and your seed packs should give you an indication.
3 – Add Some Foliage Plants
I would also recommend adding some foliage to your containers. This should include ornamental grasses like purple fountain grass or even just some parsley in between plants. It can make otherwise very boring containers look more colorful with focal points, and some fragrant foliage plants can help to keep pests away as well.
4 – Set Reminders On Your Phone
After a while, you’re going to have more plants that you can easily keep track of when it comes to watering and fertilizer needs. What I would recommend is to set reminders on your phone for each plant.
That way, you can simply check each day which plants need water and how much. Larger vegetables will obviously need more regular watering than a small herbal plant, so make sure you create an accurate list.
5 – Invest In A Moisture Meter
These are simple devices with a soil meter that you poke into the container near each plant. It will then tell you how moist the soil is to better gauge how much water you need to add each day.
It’s one of the easiest ways to make sure that your plants always have the optimum soil conditions and that you don’t waterlog the roots.
6 – Plant Small Shrubs For Protection
If you have an exposed garden or patio area where you get a lot of wind, then consider planting a few miniature shrubs and trees. These can provide enough shelter from strong winds so that the plants in the containers have some protection from drying out.
They also break up the visual effect when you start accumulating more containers.
7 – Buy Food Storage Containers
Once you start seeing your first crops, you’ll quickly find that you need ways to store them. The first few strawberries and radishes will be easy to deal with. But when you suddenly have several pounds of fruit and vegetables, you need to store them properly.
So, start collecting or buying food-grade plastic containers. One option is to reuse those plastic containers you get from take-out restaurant services. They are also ideal for freezing some of your crops for eating later in the year.
Final Thoughts
Getting started with a container garden will take less than a few hours of planning, and with less than $50, you could have your first set of seedlings growing within weeks.
I’d go as far as saying that reading this post and making a few plans for what type of container and plants to choose will take longer than actually setting up your container garden.
Head to your local garden center and make those first investments, and see how quickly and easily you can have your first container crops making it into your homegrown organic meal plans.