My family owns a cozy off-grid cabin in the hills, but since there’s no electricity, I’d only stay there from dawn to dusk.
Then I decided to build my own DIY solar generator.
I wanted something I could use to light up the cabin, power a small fridge, and charge a couple of my gadgets.
After reading heaps of spec sheets, talking to electricians, and using a few tricks of my own, I finally made it. Since I love building things, I enjoyed every step of the way, even the trial-and-error part.
But since you may not have time to waste, I’ve made this step-by-step guide. Read on and learn how to make a DIY portable solar generator yourself.
What To Consider BEFORE Building A DIY Solar Generator
Size Does Matter — Calculate Your Energy Needs
A great thing about solar energy is that it can come in all sizes for all types of applications.
While you probably won’t be firing up a bulky diesel generator to charge your phone, a DIY solar generator for RV can do exactly that but also much more. It can power a mini-fridge, trailer lighting, and even a LED TV.
However, before you start shopping around for parts, you need to know the size of the solar generator that you need.
Now there are two important components of solar generator size:
- Wattage — the total load it can take at the same time
- Capacity — the total energy it stores without needing recharge
To get these right, you need to know what you’ll use the generator for.
Let’s explore three scenarios:
Camping Trip
| Device | Wattage | Hours of Use | Total Energy |
|---|---|---|---|
| 4 LED lights | 20W | 6 | 120 Wh |
| 2 phones | 30W | 3 | 90 Wh |
| 1 laptop | 60W | 3 | 180 Wh |
| 1 mini cooler | 60W | 8 | 480 Wh |
| TOTAL | 170W | 870 Wh |
We see that for a camping trip you need a minimum 200W AC inverter and a 900Wh battery.
RV Vacation
| Device | Wattage | Hours of Use | Total Energy |
|---|---|---|---|
| 6 LED lights | 30W | 6 | 180 Wh |
| 3 phones | 40W | 3 | 120 Wh |
| 2 laptops | 120W | 3 | 360 Wh |
| 1 drone | 30W | 2 | 60 Wh |
| 1 mini fridge | 60W | 24 | 1440 Wh |
| DC water pump | 50W | 2 | 100 Wh |
| 1 LED TV | 70W | 5 | 350 Wh |
| TOTAL | 400W | 2610 Wh |
For a DIY solar battery generator for RV use you’d need at least a 500W AC inverter and a 2,700Wh battery.
What Parts Do You Need?
I’ll cover the components in-depth in the next section, but let’s just quickly run through the parts and consumables you’ll need:
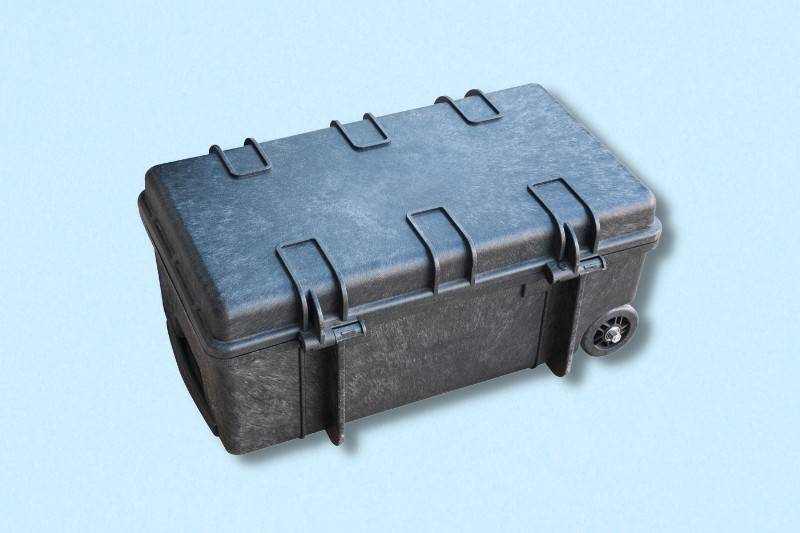
DIY Solar Generator Parts:
- Hard plastic case or toolbox
- 2000/4000W inverter
- 100W solar panel
- MPPT 40 amp charge controller
- Battery
- Battery maintainer
- 150 amp inline circuit breaker
- 18V connector
- 12V power outlet with switch and gauge (optional)
- LED Illuminated 6-way automotive blade fuse
- 100 amp mini busbar
- LED floodlight with switch
Consumable Materials:
- Self-adhesive zip tie mounts
- Silicone gasket maker
- Washers & bolts
- Automotive fuses
- Rubber cable grommet set
- Crimp terminal set
- O ring kit
- 14 gauge primary wire
- 12 gauge primary wire
- Grounded power cable
- Battery cable sets
- Zip ties
Budget Ahead
You’re looking at serious solar generator footprints here, so you may not be able to finance this out of your pocket money.
Make sure to budget ahead, as I don’t want you to make any compromises and go for sub-quality parts.
So let’s talk about what the main components may set you back.
- Portable solar panels — $300
- Solar charge controller — $160
- Battery maintainer — $45
- Battery — $1,280 (LiFePO4), $500 (lead-acid)
- AC Inverter — $300
- Case — $300
Building a DIY solar generator may cost you anywhere between $1,600 and $2,400.
The main variable is the battery type. If you’re on a budget, by all means, go with a good-old lead-acid battery.
Create Your Custom DIY Solar Generator Wiring Diagram
Finally, before you start, make sure to create a DIY solar generator wiring diagram.
The diagram not only ensures that you wire every component properly but also lets you retrace your steps in case anything goes wrong.
Parts You Need to Build Your Homemade Solar Generator
First, you need to find all the necessary parts and components that go into your solar generator.
1. A Rugged Case
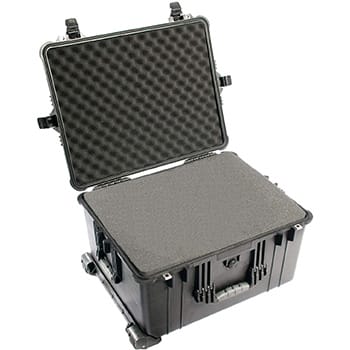
You need a waterproof, weatherproof, and above all, sturdy case that will hold all the vital parts.
My idea was to have a rig that I can transport to my cabin, so it needs to fit in the trunk. I went with the Pelican 1620 Case, which is fitted with several rugged handles, as well as a pair of rolling wheels.
If you’re building a smaller system, you can fit it into a super sturdy toolbox.
2. AC Solar Power Inverter
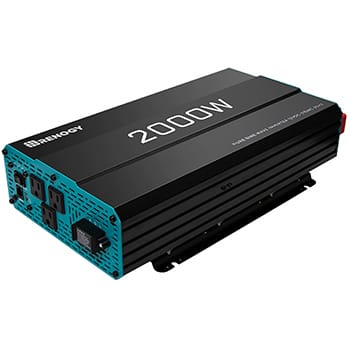
With a solar power inverter, you transform the DC voltage that is stored in your battery into the AC voltage that appliances use.
This Renogy 2000W Pure Sine Wave Inverter has a surge power of 4000W. It has overload protection for both DC input and AC output and dual cooling fans.
A bit more talk about cooling coming up.
I personally chose this inverter for its power capacity and the fact that it comes with 3 AC ports and a USB port on the business end.
Price: If you want top-shelf, be prepared to count to $320. But the inverter is the heart of the system and IMHO this Renogy is worth every cent.
3. Solar Panel
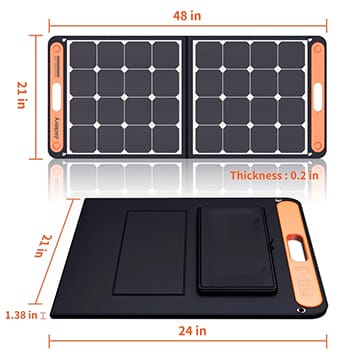
The solar panel absorbs the sun’s energy and supplies it to the battery. Your panel will be one of the most exposed elements of the generator, so it needs to be high-quality and durable as well.
I used this resilient but lightweight Jackery SolarSaga 100 Watt Solar Panel. It folds easily so I can pack it for travel and deploy it with my generator anyplace I choose to pitch a tent.
Another advantage of portable solar panels is that you can easily orient them towards the sun for the best gains.
Price: $299 is what I paid.
4. Battery
Your generator needs a battery to store solar energy. Batteries come in all shapes and sizes, but your best shot is either a lithium-iron (LiFe) or deep-cycle lead-acid battery. Here are the advantages of both types:
1. Lithium-iron Battery
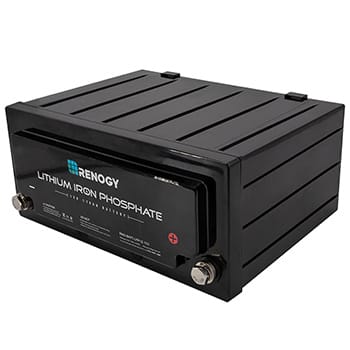
- Highly-efficient — up to 98%
- Compact and lightweight
- Can be charged partially without long-term capacity loss
- Typically have 10-year warranties
2. Deep cycle lead-acid Battery
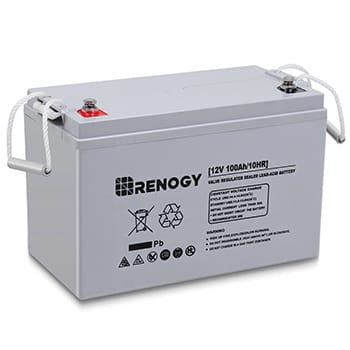
- Well-proven technology
- Up to 15-year lifespan
- Easily recycled
- Can last much longer on a low charge
Price: High-tech comes at a price. At discount, you can find a reliable LiFe battery for around $1,280, while the old-school lead-acid unit can be had for $250.
5. Solar Charge Controller
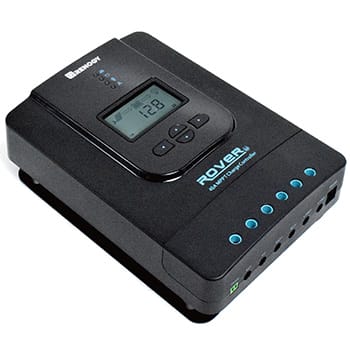
This component prevents your battery from overcharging by regulating the voltage and current levels coming from the solar panel.
If you’re building a portable solar generator, choose a solar charge controller with a moisture-tight coating.
However, as with the AC inverter, charge controllers have to deal with a lot of heat.
I picked the Renogy Rover Li 20 Amp because its die-cast aluminum ensures great heat dissipation.
It’s an MPPT (Maximum Power Point Tracker) controller which means it can process higher solar panel voltage inputs. It also allows for optimum charging even in cloudy weather when the maximum output of panels varies during the day.
Price: If you can find it for $160, you’re good to go.
6. Battery Maintainer
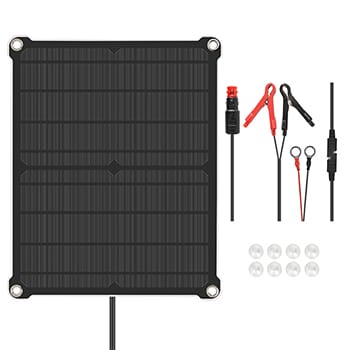
A battery maintainer is a small battery charger that supplies your battery with a small amount of electricity when it stays inactive for long periods.
This maintains a healthy state of charge and extends the life of your battery.
You can find maintainers that plug into a wall outlet and use grid voltage.
However, I wanted my system to be 100% independent of the grid so I got a solar battery maintainer.
This one comes with a 10W foldable solar panel that gives it just enough charge to do its job.
Price: Around $45 — that’s nothing compared to the health of your $1,000+ battery.
7. AC Power Inlet
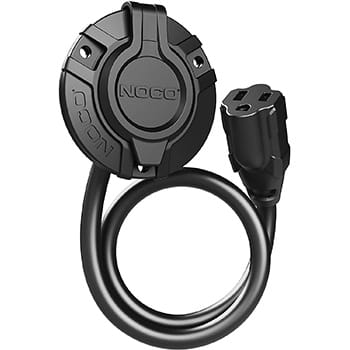
This is the external inlet on the hard case.
Choose a power inlet that needs no cable modifications or hand wiring and comes with an 18-inch extension cord.
8. LED Flood Light
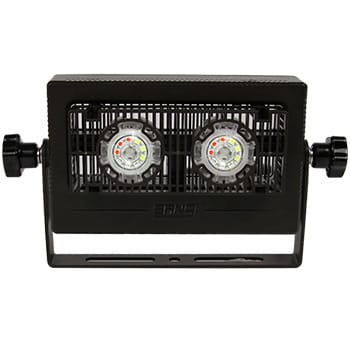
Fit your generator with a powerful and reliable LED floodlight so you can use it as a light source around your campsite, boat, etc., or during a power outage at home.
The floodlight doesn’t have to be plug-and-play with an onboard switch, as we’re going to wire it centrally on the inside. The adjustable bracket and heat dissipation fins are nice to have.
Consider a Solar Kit Instead!
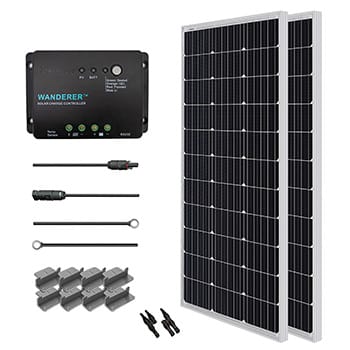
If you’re not sure if different solar generator components will be compatible, you can take a shortcut and get a Renogy 200W Solar Starter Kit.
This DIY solar generator kit includes two 100W solar panels, one 30A charge controller, and a solar adaptor kit together with all the cables and connectors you need.
The panels that come with this kit have corrosion-free aluminum frames, so you can use them outdoors for extended periods.
The List of Tools You Need
To build your solar generator you’ll need a few basic tools that include:
- Automatic wire stripper with cutter
- Crimping pliers
- A set of Phillips, flat and Torx screwdrivers
- 111-240V hot glue gun
- Cordless drill with drill bits and grinding extensions
- Jigsaw
- Utility knife
- Files
Step-by-Step Guide to Building A DIY Solar Generator
Step 0: Test the Equipment Before Assembly
First, you need to test the panel and the charge controller.
- Plug the two pigtails cords coming from the panel in the appropriate (+) and (-) sockets on the charge controller.
- Now, hook the controller to the battery.
- When you hook the negative cable, a green light on the controller should light up — showing that the battery is charged.
- Flip your panel towards the window to make sure it’s picking up sunlight, and another green light on the charge controller should come on — showing that the panel is charging the battery.
Next, you need to test the inverter.
- Hook up the red and black cable the inverter came with on the inverter terminal, and hook the other end of the cables on the battery.
- Make sure you connect the positive cable first.
- To test the inverter, switch it on and plug in a home appliance with a decent load. I used a fan, myself.
Another component you need to test is the battery maintainer.
- Disconnect the battery from the controller and hook the maintainer cables to the appropriate poles of the battery.
- Again, make sure to connect the positive side first.
At the same time, you can test your surface mount contactor.
- Plug the extension cord from the wall socket.
- If everything is right, both green and red lights on the maintainer should come on.
- After a few seconds, only the red should remain — showing that it needs charging.
Step 1: Prepare The Housing Unit (Mark and Cut the Openings)
The Pelican hard case is what I used as the housing unit for my DIY solar power generator.
First, I had to modify it by making openings for input and output ports.
If you’re doing it my way and use a SolarSaga 100W panel, you need one 18V DC outlet, as these panels come with an 18V/5.5A DC cable.
If you want to plug in two SolarSagas, plan for another 18V outlet or an adaptor.
All things considered, you need to make cutouts for
- Solar panel input socket
- Battery charge controller
- Battery maintainer and its 10W solar panel
- AC inverter front end
- LED light
- LED light switch
- Any other 12V DC ports
You can use masking tape to make the initial marks. This way you can adjust them without leaving permanent marks on your case.
Keep in mind that outlets you buy have a flange profile (that sits on the surface) and a cut-out profile (that fits into the hole). Make sure to measure holes by the cut-out profiles.
Measure the actual size of each hole and trace the lines onto the case. If in doubt, always cut smaller and then file or trim the opening larger if needed.
For straight cuts, use a vibrating multi-tool with a plunge-cutting blade. For the round holes, you can switch between drill bits and hole saws.
To trim and adjust the holes, use a rotary cutting blade with a pneumatic die grinder.
You can check an article comparing Milwaukee and Dewalt power tools on Tool to Action if you need help with choosing the right power tools to use in this step.
If you prefer hand tools, you can achieve the same with a utility knife or a file.
Step 2: Mount External Components
Once you’ve cut the holes, test the LED floodlight for fit then line the edges with black silicone sealant to keep the box interior waterproof. Once the silicone starts to cure carefully place the light in its slot.
If you use a flashlight with a swivel just make holes for the cable and screws.
Do the same with the light switch. I used a switch with an indicator light that has three connectors on the other end.
If the 18V DC charging port doesn’t come with a rubber gasket, make sure to secure the fitting with silicone.
Repeat the process for the components on the other side of the hard case.
As I used the inverter front panel directly, the inverter is both an external and internal component of a sort.
For the inverter front side panel, you’ll also need some silicone sealant. Secure the panel with self-tapping screws.
Note: If the solar power inverter has a peak capacity above 4,000 watts, you need to use 12 gauge wire for any extra GFCI outlet you want to add. Always give yourself 4-5 inches of wire more than you need.
Step 3: Mount the Battery
Since the battery is the heaviest component, put it in the corner closest to the case wheels. You can orient the battery in any direction, but make sure it’s well supported in the directions the case is likely to be used.
Important: The battery will get hot in operation so you may want to prop it at least two inches from the floor for better cooling.
Glue two wooden standoffs to the box floor and screw the battery to these.
If you want to be extra sure, don’t fix anything permanently until all components are ready for mounting.
Step 4: Position the Solar Power Inverter
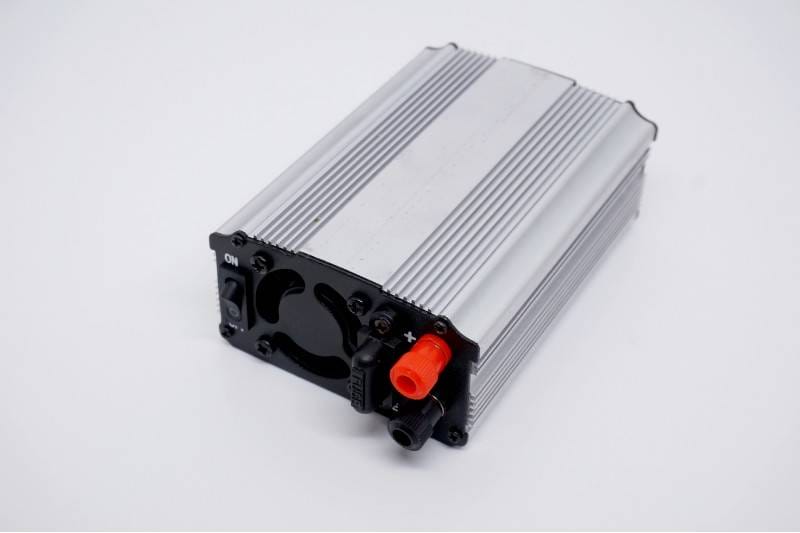
I positioned my AC pure sine wave inverter so that its front panel is protruding outside the box. If you go with a less advanced inverter, just make sure its outlets are close to the GFCI weatherproof outlet and its 12V cables within the reach of the battery.
Talking about reach, keep in mind that the inverter has twin-cooling fans. This means there needs to be a bit of space behind it.
There is another reason why I think that the inverter front end should “stick” outside. This side is perforated for a reason — this is where the fans suck in the air needed to cool down the whole thing.
When I was making my DIY portable solar generator, I placed the battery on one side and the inverter on the other. This way, both components have plenty of room for air to circulate.
Also, make sure you prop the inverter at least 2 inches from the floor as you did with the battery.
Mark the bottom hotels for the inverter and mount the hardware using #10-24 machine bolts, with washers, spring washers, and nuts.
Step 5: Mount the Charge Controller and AC Battery Maintainer
The best place for the charge controller and the AC battery maintainer is on one of the sidewalls of the case, between the input and output sides.
Keep in mind that the charge controller has a display and control buttons, which means you need to make those accessible and visible.
Once you have mounted all external and internal components, you need to wire them together.
Move on to the next step to see how I did it.
Step 6: Complete The Wiring Process
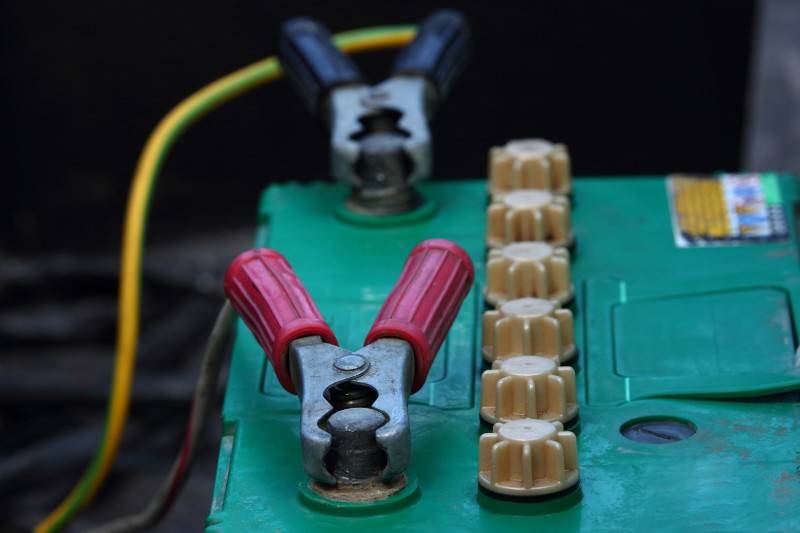
Now I’m going to explain the wiring process.
You need to connect:
- Inverter to battery
- Battery to negative bus and fuse box
- LED floodlight
- Battery charging circuits
Inverter to Battery Wiring
Start by routing the primary power cables from inverter to the battery. This is just to see how long they need to be and where you can tuck them in. You’ll actually connect these the last.
For this I want you to use red and black 14 gauge wire. Remember to use red for the positive terminals (+) and black for the negative (-), as well as to add an inline fuse on the red wire.
The fuse rating depends on the battery you use, so it will be either 12V or 24V.
When you know the length, strip the end of each wire and fix a 14 gauge ring crimp using the crimping tool.
Since 14 gauge cables are no joke, you’ll need some heavy-duty crimpers. OR you can use a hammer and a punch. When the stripped end of the cable is in place just punch the crimp casing so it grips the wires together.
Battery to Negative Bus and Fuse Box
To distribute power in my homemade solar generator, I used a 6-circuit fuse panel for the positives, and for the grounds, I used a busbar.
Fix both of these to the case floor using a hot glue gun. Once the glue dries, I recommend you add another layer of superglue all around the edges.
Do the same for the positive inline fuse on the primary power cable.
To connect the battery to these central distribution hubs, use the same 14 gauge wires. Again red for (+), and black for (-).
As you add more wires, you may start to use zip ties to keep the wires in the routing pattern you want them in.
LED Floodlight Wiring
To wire the LED light, you need to shorten the cable just enough to reach the switch. Strip the outer insulation on the end, as well as the insulation of the (+) and (-) wires that are inside.
Since the switch also has an indicator light, it will need a ground wire as well.
Take a free end from a roll of black wire and you’ll connect together with the black wire from the LED light onto the same crimp. This way they can both share the ground and we can connect them to the power switch.
For most of the connections, I used crimp-on slide connectors.
Go ahead and crimp both the red and two black wires for the LED light as these will go into a switch.
Now you need to connect the switch to a distribution block. Use the red wire for this.
Once you have the three crimps connected to the switch, lead the free ends of the red and black wire to the 6-circuit fuse panel and the ground busbar, respectively.
If mount the LED light on the lid, as I did, make sure to leave these wires long enough for when the lid is fully open.
Apply another couple of zip ties to make it all neat.
Battery Charging Wiring
Take the leads from the 18V socket and connect the charge controller. Now go ahead and connect the charge controller to the fuse box and negative bus bar.
Since I used a solar battery maintainer that has its own solar panel on the top of the lid, I just terminated the (+) and (-) leads to the fuse box and negative bus bar.
Step 7: Recheck The Components and Wiring
When everything is in place, the only thing that remains is for you to check if the rig is working.
First, put the battery connection back on, and you’ll immediately see that the blown fuse light immediately turns on several of our circuits. That’s because you haven’t actually put in the fuses yet.
Now it’s time to insert our fuses and test our components.
Here’s what I used:
- Charge control circuit — 40 amp fuse
- LED floodlight circuit — 10 amp fuse
- Battery maintainer — 5 amp fuse
When the fuses are in place you can test the LED light switch. Finally, flip the inverter switch on to see if it comes online.
If everything is working fine, it’s time to add the solar panels.
Step 8: Connecting With The Solar Panels
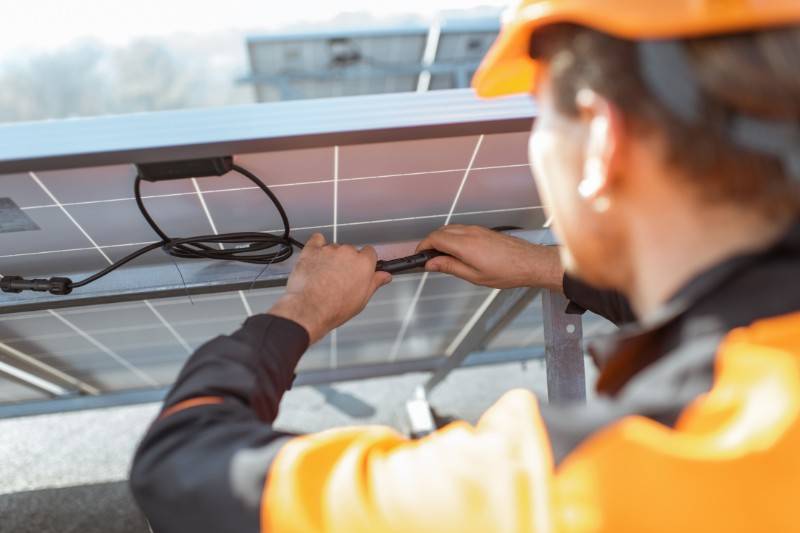
At the end, you need to plug in the solar panels. The SolarSaga 100W panels come pre-wired with 18V connectors so that’s the kind of socket I used.
If you’re looking to add more panels, the easiest way is to use a parallel connection adapter.
In case the panels you choose come with MC4 connectors, you need a couple of MC4 pigtails.
To make the extension, use 16 gauge high-quality speaker wire. It is highly flexible and more suitable for portable use than other types of wire.
Strip the ends of the speaker wire and use butt splice connectors to crimp them to MC4 pigtails.
Now secure the whole connection with a couple of rounds of insulating tape. Apart from making the connection extra secure, the tape makes the connection weather resistant.
Things To Keep In Mind If You Use A Custom-Built Lithium Battery
If you have enough experience in DIY electronics, you can make a custom lithium battery to use with your system.
There are several things to keep in mind:
Low-Temperature Cut-off or Heating System — Lithium batteries can’t be charged under 32°F (0°C) without suffering permanent damage. If you use a lithium battery, find a solar charging controller with low-temperature cut-off.
MPPT Charge Controller Capable of Charge Profile Editing — Each battery needs a different max voltage. Program the MPPT charge profile parameters for the exact type of battery you plan to use.
Over-Discharge Protection System — If you over-discharge a lithium battery, you’ll change its chemistry and damage it permanently.
High-Temperature Protection — If you plan to use the battery in a high-temperature environment, you’ll need a battery cooling system.
Cell Balancing — If you regularly charge and discharge from 100% to 0%, your cells will fall out of balance, so you need to use a manual RC battery cell balancer.
Potting batteries — Lithium batteries contract and expand during discharge and charge. So unless you compensate this with a foam pad, you shouldn’t pot them.
Why Build Your Own DIY Solar Generator
Solar energy is the cheapest source of energy in the world and one of the rare few alternative sources that cause no pollution or negative environmental effects.
For me solar energy is also incredibly convenient — I can access it everywhere and use it any time, even at night.
Solar energy users worldwide save the planet 75 million barrels of crude oil each year, which is a huge step in making our planet green again.
A DIY solar generator is a self-contained and portable mini-power plant that can allow you to be 100% independent from the grid.
Let’s look into a few reasons why you should build a DIY solar generator for camping or off-grid living.
Greener Than Fuel Generators
With zero emissions, solar generators are far more environmentally acceptable than those running on fossil fuels. When you are enjoying the great outdoors, the last thing you need is a diesel generator polluting everything around you.
Safer Than Gas Generators
Solar generators are much safer to use indoors and outdoors than those running on fossil fuels that may leak or cause a fire.
No Running Costs
Once you invest in components and tools, your spending is done. Their components typically have warranties that go over 20 years.
You Can Repair Them Easily
Unlike fossil fuel generators that use complicated internal combustion engines, solar generators are easy to repair as they are to build.
More Powerful Than Ready-Made Ones
Not all ready-made generators are powerful. If you need more energy than an average RV owner, then building your own generators is the way to go.
DIY Gives You Pride Of Accomplishment
While building your solar generator, not only can you learn a lot about technology, but also gain a sense of personal accomplishment. You can include your spouse and kids and make it a family project.
Less Expensive Than Ready-Made Ones
If you purchase them individually, the components recommended here will cost you much less than a complete ready-made generator system.
Frequently Asked Questions (FAQ)
No, a solar generator can’t power a whole house. Solar generators don’t have enough wattage capacity to power a whole home. You can use one for your boat, RV, or campsite, and in an emergency, just a part of your home until the grid power comes back on.
The size of your solar generator depends on your power needs. You can calculate this by checking the power ratings of different tools and appliances you may want to power or charge with your solar generator.
Solar generators last between 20 and 30 years. Components for a DIY solar generator usually have 2-decade warranties.
Yes, you need a generator even if you have solar panels. However, you should never use them together at the same time. Your solar panels are tied to the grid at all times, but in a blackout, the generator can provide emergency power, for example, for lighting.
Yes, solar generators are very quiet. Unlike fossil fuel generators, a solar generator system doesn’t use an engine and the only noise you may hear is the buzzing coming from the inverter. This makes solar generators ideal for outdoor activities where you don’t want to disturb other people.
A solar generator can power electronic devices such as smartphones, laptops, portable TVs, small applications, and lights. They aren’t suitable for more powerful home appliances like washing machines, ranges, and fridges.
Yes, solar generators are a good choice if you don’t require a lot of electric power in your home or need to power your boat, RV, or a cabin.
Conclusion
Sure, you can go out and buy a ready-build solar generator that meets your needs. However, if you have all the tools lying around, and know a bit about wiring, you can build one yourself and enjoy its many benefits.
A DIY generator costs much less than a factory-made one, not to mention that you can custom-choose many parts.
The whole point of building a solar generator from scratch is staying self-sufficient and proving to yourself that you can use your skills and brains to become independent from the grid.
Now when you know how to make a solar generator, why don’t you go ahead and build one yourself now?

