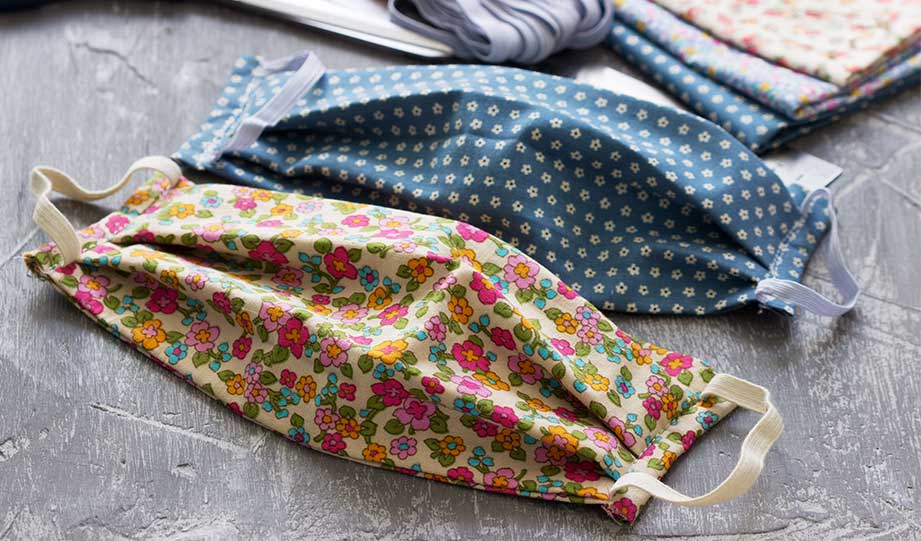
When the COVID-19 pandemic started to hit the USA, people immediately tried to get their hands on face masks. This was reinforced when many counties in California and other states introduced mandatory face mask laws for people who need to go out in public.
The problem is, single-use face masks are severely harming the environment. Many of them end up in oceans, where they can poison marine animals that accidentally ingest them.
But they’re necessary if we want to stop the coronavirus from spreading.
So what do we do?
We can use reusable face masks instead.
According to a new report from the UCL Plastic Waste Innovation Hub, we can avoid as much as 66,000 tonnes of plastic waste per year if we use reusable fabric masks.
But before you just tie a coffee filter to your face (yes, we have seen people do this), we’ll show you how easy it is to make one at home.
How To Sew A DIY Cloth Face Mask
Let us start by saying two things.
First of all, these DIY instructions are not going to be for medical-grade N95 face masks. But they adhere to the guidelines in the CDC website on the types of masks and respirators that you can use to protect yourself and others from getting and spreading COVID-19.
Secondly, you won’t need to have the skills of a professional tailor or a sewing machine for that matter. We’ll give you some simple information on what you can do instead in the next section.
OK, here’s our tutorial for a DIY mask with filter. Let’s start with what you need.
Materials
- Tightly woven cotton fabric
- Soft flannel material to act as a filter (you can use flannel burp cloths that babies use)
- A role of elasticated band 1.8 inches thick
- Safety pins to hold the pieces together
- Sewing machine (we recommend this Singer Heavy Duty Sewing Machine for this job)
- Iron (you can get this Rowenta Steam Iron if you don’t have one yet)
- Sharp scissors to cut the cloth
Instructions
- Cut the chosen fabric materials into 6×9 inch rectangles. This includes the flannel, as this will become the middle layer that will act as the filter.
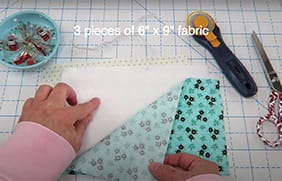
- Place the cut flannel piece in front of you. Take the first piece of cloth and place it on top of the flannel with the outside pattern facing down.
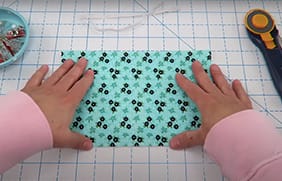
- Cut two strips of the elasticated band to about 7 inches. Pin one end of the band to the top right corner of the cloth, about half an inch from the corner. Then pin the other end on the bottom right about half an inch from the corner as well. Then repeat these on the left side of the cloth.
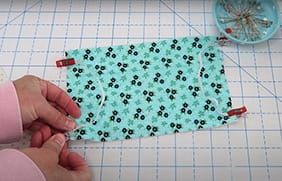
- Now place the second piece of the cut cloth fabric on top. You’ll need to reattach the safety pins so that all three layers and the bands are held in place to complete the mask template.
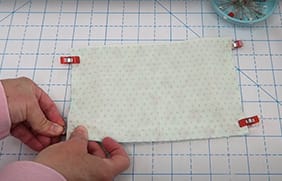
- Start stitching about one and a half inches above the bottom right corner and move clockwise around the materials. Double stitch or backstitch over the elastic bands so they would stay secure.
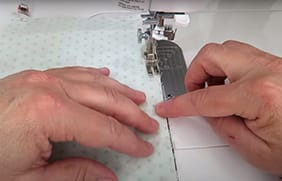
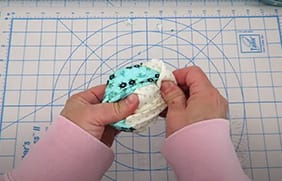
- Do not continue the stitching all the way around and leave a 2 to 3-inch gap. Then turn the materials inside out through that gap that you left.
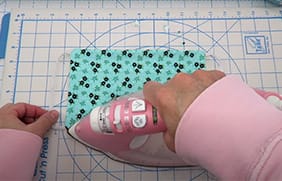
- Flatten the materials with your iron to make your mask nice and smooth.
- Fold it so that it partially overlaps for about a quarter of an inch and pin the fold on both sides. Do this again for a second fold at the bottom, making sure that they are evenly spaced.
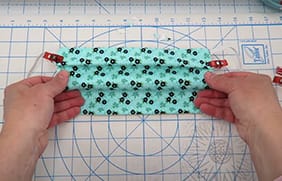
- Starting at one of the corners, sew all the way around the mask.
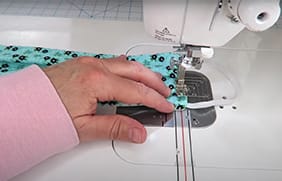
That’s it, your homemade face mask is now ready to be worn! You can make more for the rest of your family as well.
If you’re making them for kids, then adjust the cloth size accordingly. You should also consider using a fun mask pattern that they’ll enjoy
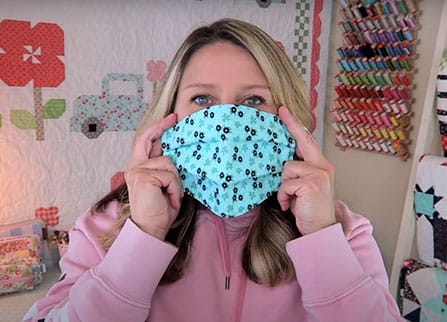
Compared to single-use masks, the reusable face mask you’ve made will help significantly reduce the amount of global plastic waste.
If you don’t have a sewing machine, then you could hand stitch it. However, that would be a bit painful and time-consuming.
Luckily, we have an alternative solution in the next part of this tutorial.
If you want, you can also watch the video tutorial below that demonstrates all the step-by-step instructions we’ve laid out above.
How to Make A DIY Face Mask Without A Sewing Machine
The information above is great if you have a machine that you can use to sew your face mask. However, if all else fails, then there’s still a way to make face masks and reduce the spread of coronavirus.
CDC recommends wearing cloth face coverings in public settings where other social distancing measures are difficult to maintain (e.g., grocery stores and pharmacies), especially in areas of significant community-based transmission.
— Center for Disease Control and Prevention
Again, keep in mind that this DIY tutorial on how to make a face mask won’t be for a medical-grade mask.
But if you’re not a health worker, then reusable cloth face coverings such as this can be as effective as a single-use mask but without the environmental risks.
Materials
- One standard size cloth bandana (something like these cotton bandanas)
- Two rubber bands or hair ties
Instructions
- Place the cloth bandana flat in front of you. Fold the top half down to the middle and the bottom half up to the middle.
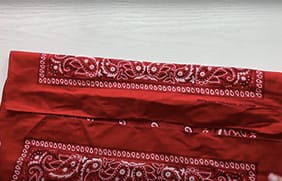
- Turn it over and repeat step 1. You should end up with about a 4-inch folded piece of cloth.

- Take the first rubber band and feed the cloth through the band about 1/4 of the way. Then use the second rubber band and feed the cloth through in a similar way on the other side.
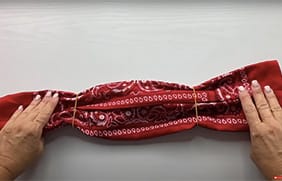
- Turn it over again and fold both sides to the middle so that the rubber band is at the edge of each end of the cloth.
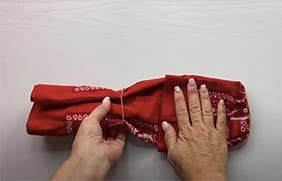
- Tuck the loose ends of the cloth inside each other.
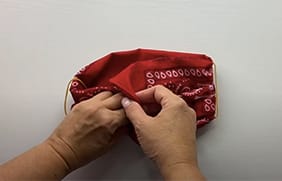
And you’re done! You can now place it over your face and loop the bands over your ears.
You may need to experiment a bit with the right sized rubber bands or hair ties. Also, we would suggest not using very thick bands as they tend to be quite uncomfortable.
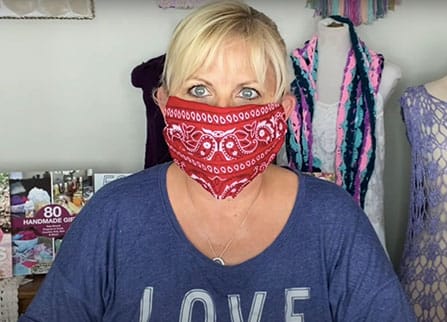
The cloth should create enough of a filter to stop droplets with potential coronavirus from getting in contact with your mouth and nose, which is already half of the battle.
If you’re more of a visual person, you can watch the video below instead.
Where To Get Reusable Face Masks

If you’re still finding it hard to make your own cloth face mask, you can also pick a few from Amazon and have them delivered straight to your home.
We saw these AIR+ face masks and it seems like they could be a worthwhile option because not only are they reusable and stretchable.
This means that they can do a good job of keeping bacteria away from you.
And if you’ve got sensitive skin, then a mask that’s made from bamboo charcoal can prevent you from itching or developing allergies.
Another option could be these Saris and Things Breathable Face Masks. They are made from cotton and are also reusable.
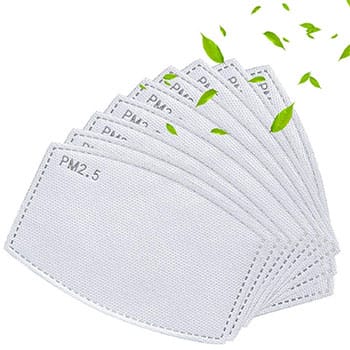
While you’re at it, we suggest getting a couple of PM2.5 filters as well.
While not reusable (they need to be replaced every 3-7 days), they’re also not single-use, and they can still give you an extra layer of protection.
You can try out these 5-Ply Activated Carbon Filters from OUBA that promise 5 layers of protection against many kinds of particles and fumes.
There’s also these ZITOOP Activated Carbon Filters that reviewers say are great as fabric face mask inserts.
Frequently Asked Questions (FAQ)
You should wear a face mask to protect yourself and others from any potential exposure to COVID-19. From a medical perspective, the virus most likely spreads through airborne droplets. By using face masks in public, even DIY ones, you could reduce the risk of coming in contact with coronavirus droplets.
You should make your own face mask because the medical-grade ones should be kept available for medical staff, and besides, it has become increasingly difficult to buy them. Also, a reusable face covering is much more friendly to the environment, since it doesn’t contribute to plastic waste.
Yes, homemade face masks really work, as long as you’re not constantly in a hospital setting with a high risk of COVID-19 exposure. The CDC has issued information that suggests that even a simple DIY fabric and cloth face covering could significantly reduce the risk of spreading the COVID-19 virus to other people when you’re out in public.
The best fabric for a DIY face mask is a tight woven cloth like cotton. Even though you will be using multiple layers or folding the cloth over on itself, it needs to be tight enough to stop droplets. At the same time, make sure you avoid a fabric for your cloth face covering that is almost airtight, as it could make breathing difficult.
You should put a flannel fabric filter in a face mask, as it acts as an effective barrier for small particles. While it may not provide medical-grade protection, it should be enough for short human interactions.
Conclusion
Because things are changing so rapidly with the coronavirus pandemic, it’s important to note that the advice and information from the CDC may change.
However, if you want to be prepared for a prolonged period of mandatory face masks, then we would suggest buying more fabric for your cloth face covering and getting busy.
It should only take you a few hours to follow the GreenCitizen team’s tutorial instructions and make a DIY cloth face mask for every person in your household.
That way, you should have enough of them to rotate through a washing and drying cycle. Especially if the mandatory mask laws remain in place for a longer time, then this could hugely reduce the amount of plastic waste that’s being created by single-use face masks.
Did you like this article? If you did, check out more articles about green living on our blog.
You can also visit our Green Store if you want to check out more eco-friendly products that you can use at home.
References
- https://www.cdc.gov/coronavirus/2019-ncov/prevent-getting-sick/diy-cloth-face-coverings.html
- https://eandt.theiet.org/content/articles/2020/05/reusable-masks-for-public-would-avoid-vast-environmental-impact/
